
Textures and Ornaments
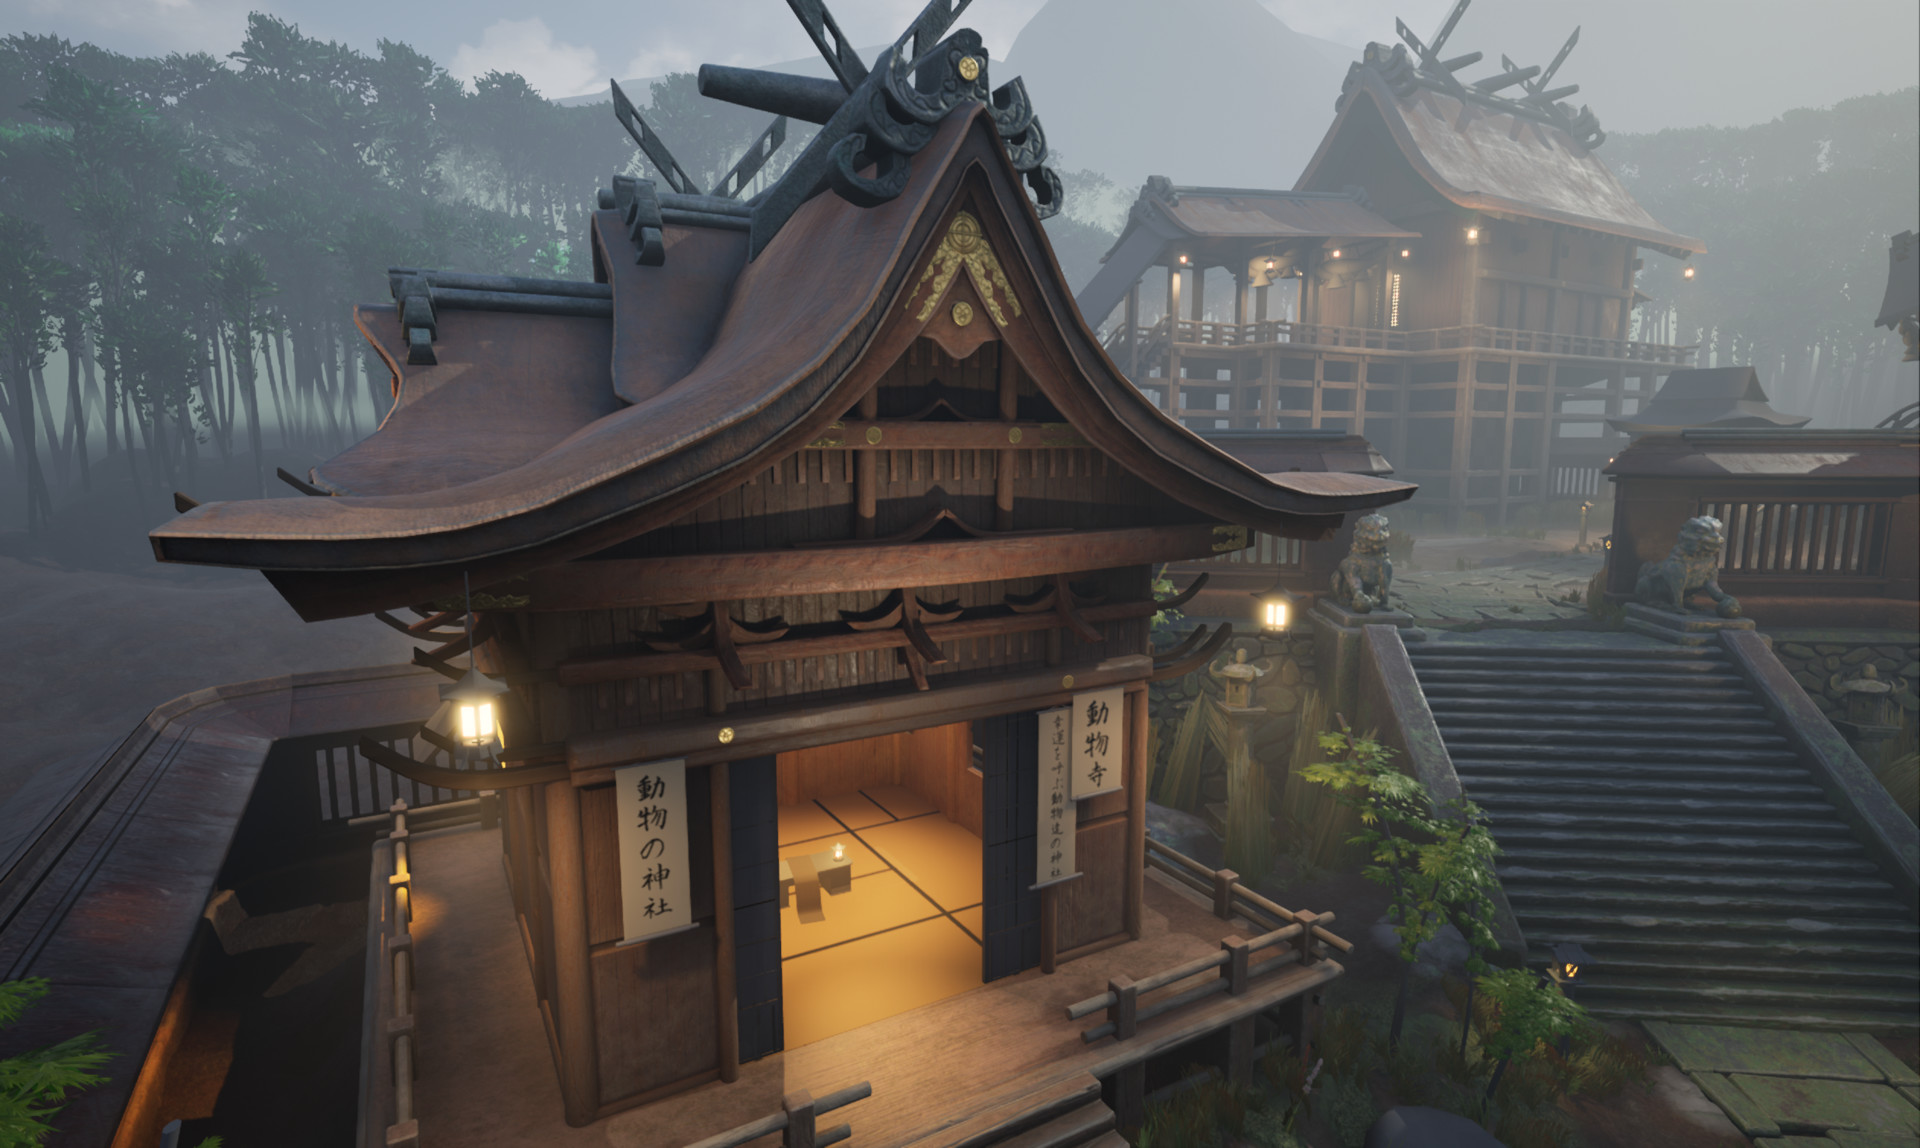
I nearly finished texturing the whole exterior of the calligraphers workshop. Texturing this was a self-exploration in the sense of realising that I am incredibly picky when it comes to wood textures… The result you see is a combination of 2-3 materials I made in Designer, combined with Smart Masks in Painter after a bake of high-poly sculpted quickly in Zbrush.
I’ll show you the materials properly rendered in Designer, but that will be later, as I am a bit too lazy to go back once again to those dreadful graphs (dreadful in the sense of I, going back to them multiple times, after realising that I’ve forgot to expose a specific value, exporting them multiple times, and relying to naming conventions similar but just as plainly unimaginative as wooden01, wooden02, wood03_final, wood03_final01, wood_final_final…).
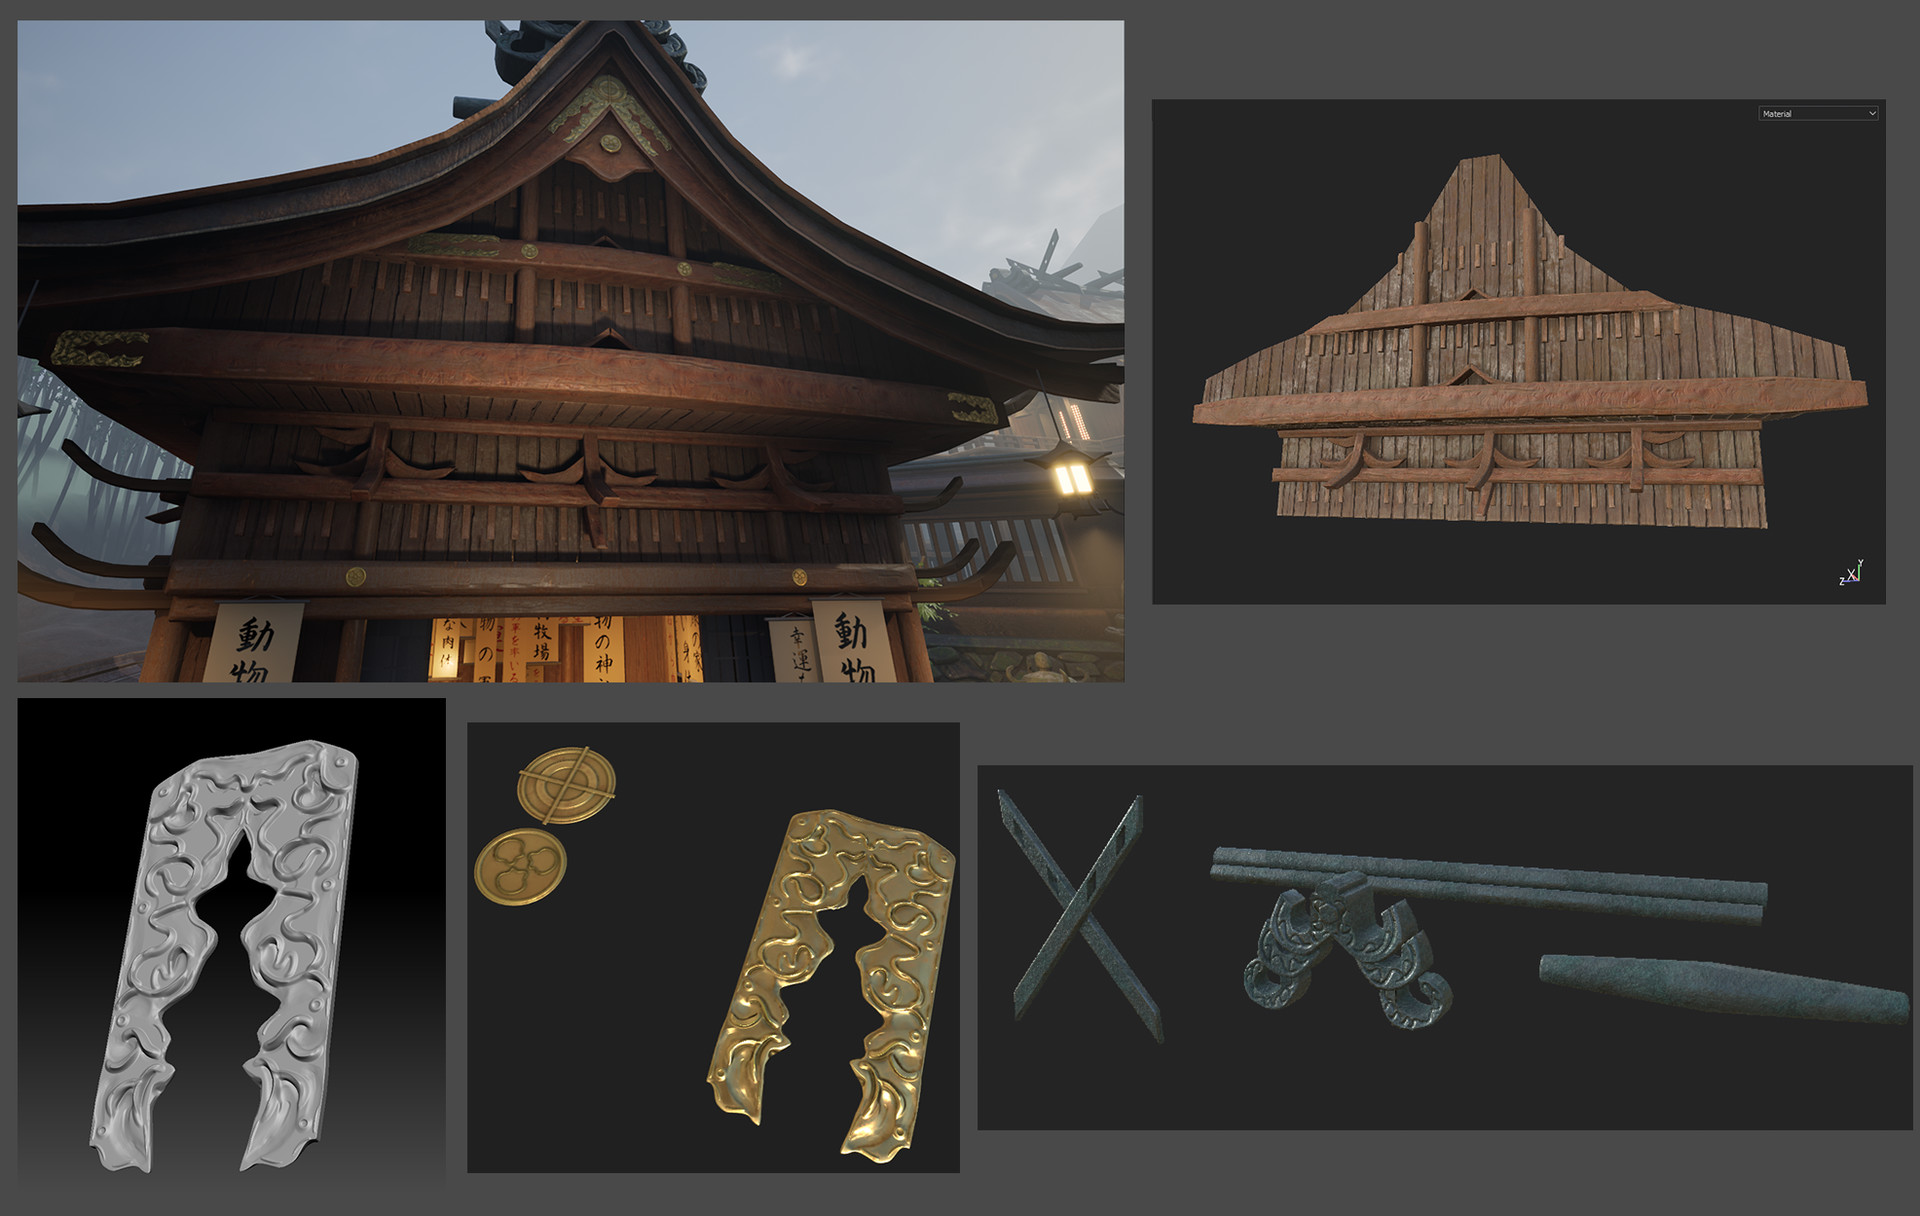
Although I tried to have some color variety in the wood itself, I knew that I will need to break it up with some ornaments. Also I really wanted to have something metallic in my scene. Every cool kid seems to have one texture set with just alphas for ornaments so I couldn’t skip on making one myself. I did that by baking in Designer some high-poly shapes I made in Maya and Zbrush. Using the Normal and Curvature together with deploying a vast number of Levels Nodes to get some specific edges, I build up some color and roughness variation in the gold.
What I love about that pipeline is the fact that I can go back to my bake set-up, quickly add some more shapes, and after I do a new bake in Designer, the newly created shapes will instantly have the golden look without me having to do any more work. Also right now my texture set is 60-70% empty, so I have plenty of space to create some more interesting shapes and motives, instead of just the circles and the other one.
The way I’ve illuminated the front of that building is very theatrical and dramatic. Although I really, really like it, I will most certainly tweak it later on.
Next up is to model out some more furniture in there and also finally put some proper paper textures and roughness on those scrolls and posters.
As usual, thanks for reading. Have a good one from me.