Walls of the Circular Room
At the end of the previous blog entry we looked in detail at the center platform and its sculpt. I showed how the mesh underwent a few changes, getting it from alien crop circles appearance to a more ordinary brick and pavement look. You could revisit those screenshots over here - The Amarantos Ritual - 02 - Reference.
I did, however, slightly skip over looking at the lower walls of the environment and what I did with their sculpts. I also mentioned that we should look at the upper parts of the scene too, and briefly talk about the wall pieces, windows, and dome elements there.
Roof Blockout
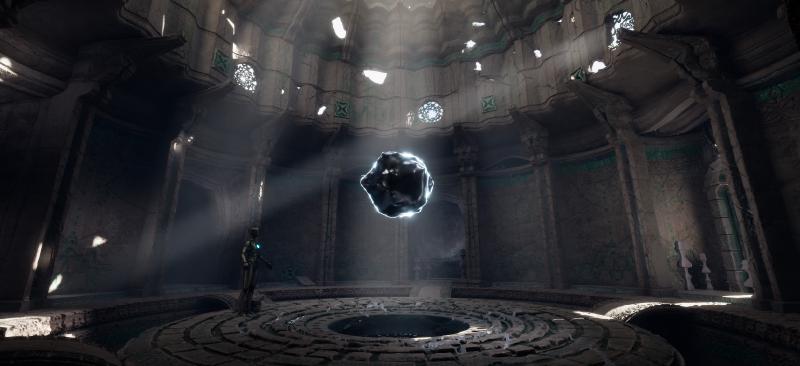
Taking a step back, in this screenshot seen below we can see my initial blockout of the ceiling. My approach to putting the place together was as follows: I blocked out the lower levels walls. I put in the middle platform so the orb is centered, floating on it. I added little bridges and a bunch of pillars. I then added one upper level of walls - the ones where the circumference of the room shrinks once for the first time. It creates a dome like appearance where the pillars are. The walls above get to host some circle cut windows.
Once I had all of this blocked out, I set on to sculpt further all of the above described assets. After sculpting them I did an initial texturing pass. Even then, when I still had no roof, I knew I want to create a dome appearance on the upper ceilings. I knew I want to open up a tall space around there and not end up the celling ending close to the orb, thus making a claustrophobic space.
Even though I knew and was planning all of that I had still not made most of the blockout upper assets and ceiling pieces.
Instead once I had done the first sculpting and texturing pass of the lower levels, and once I had seen it work well and I liked it, I set off to continue the missing ceiling.
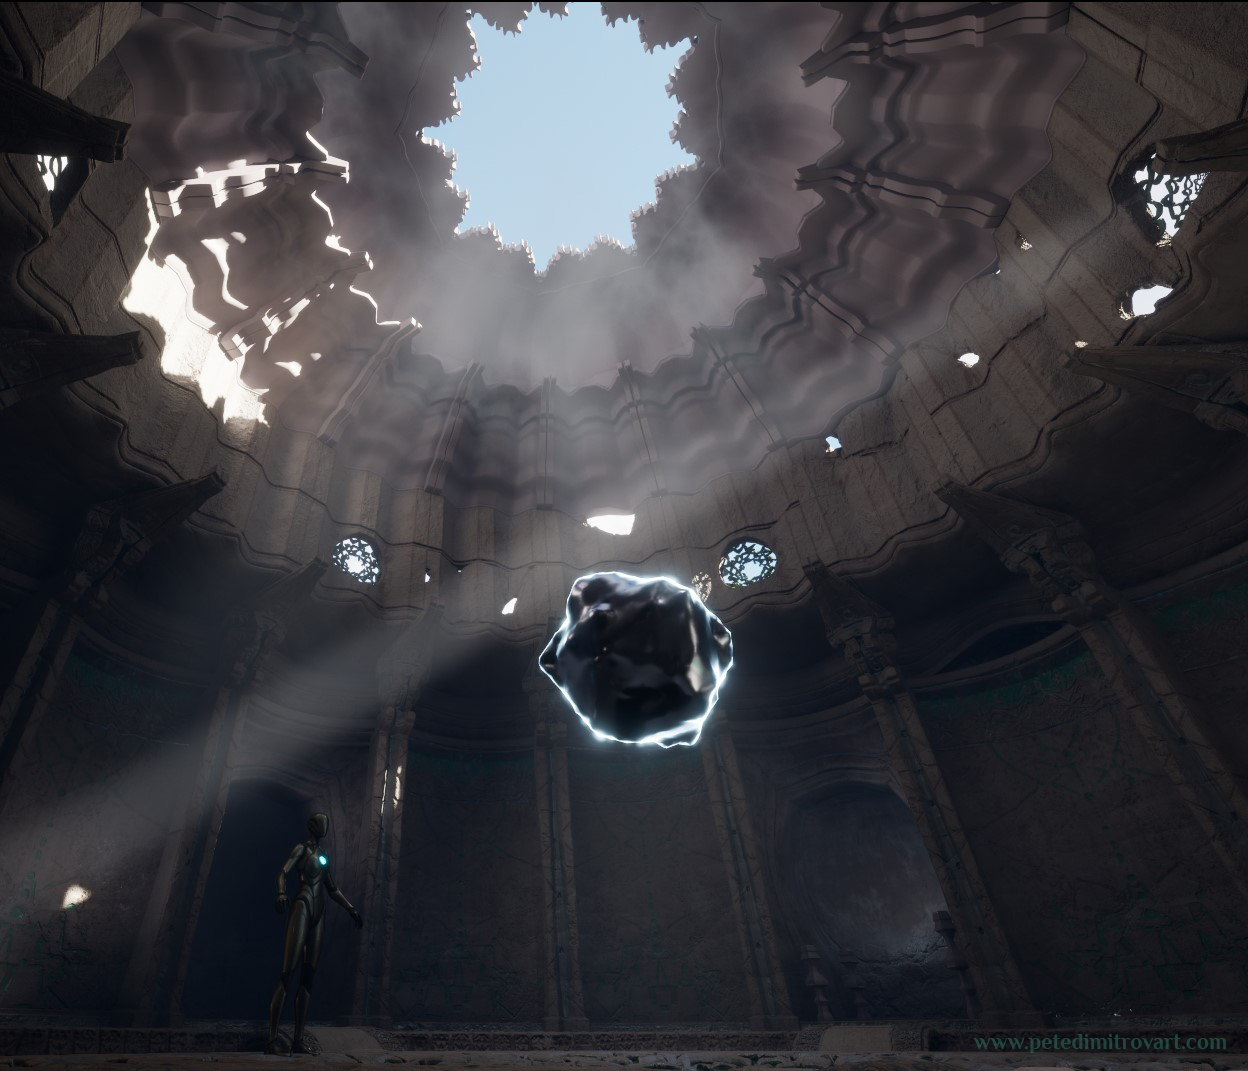
That is how the upper levels looked - in mid-blockout - when I was testing out the shapes.
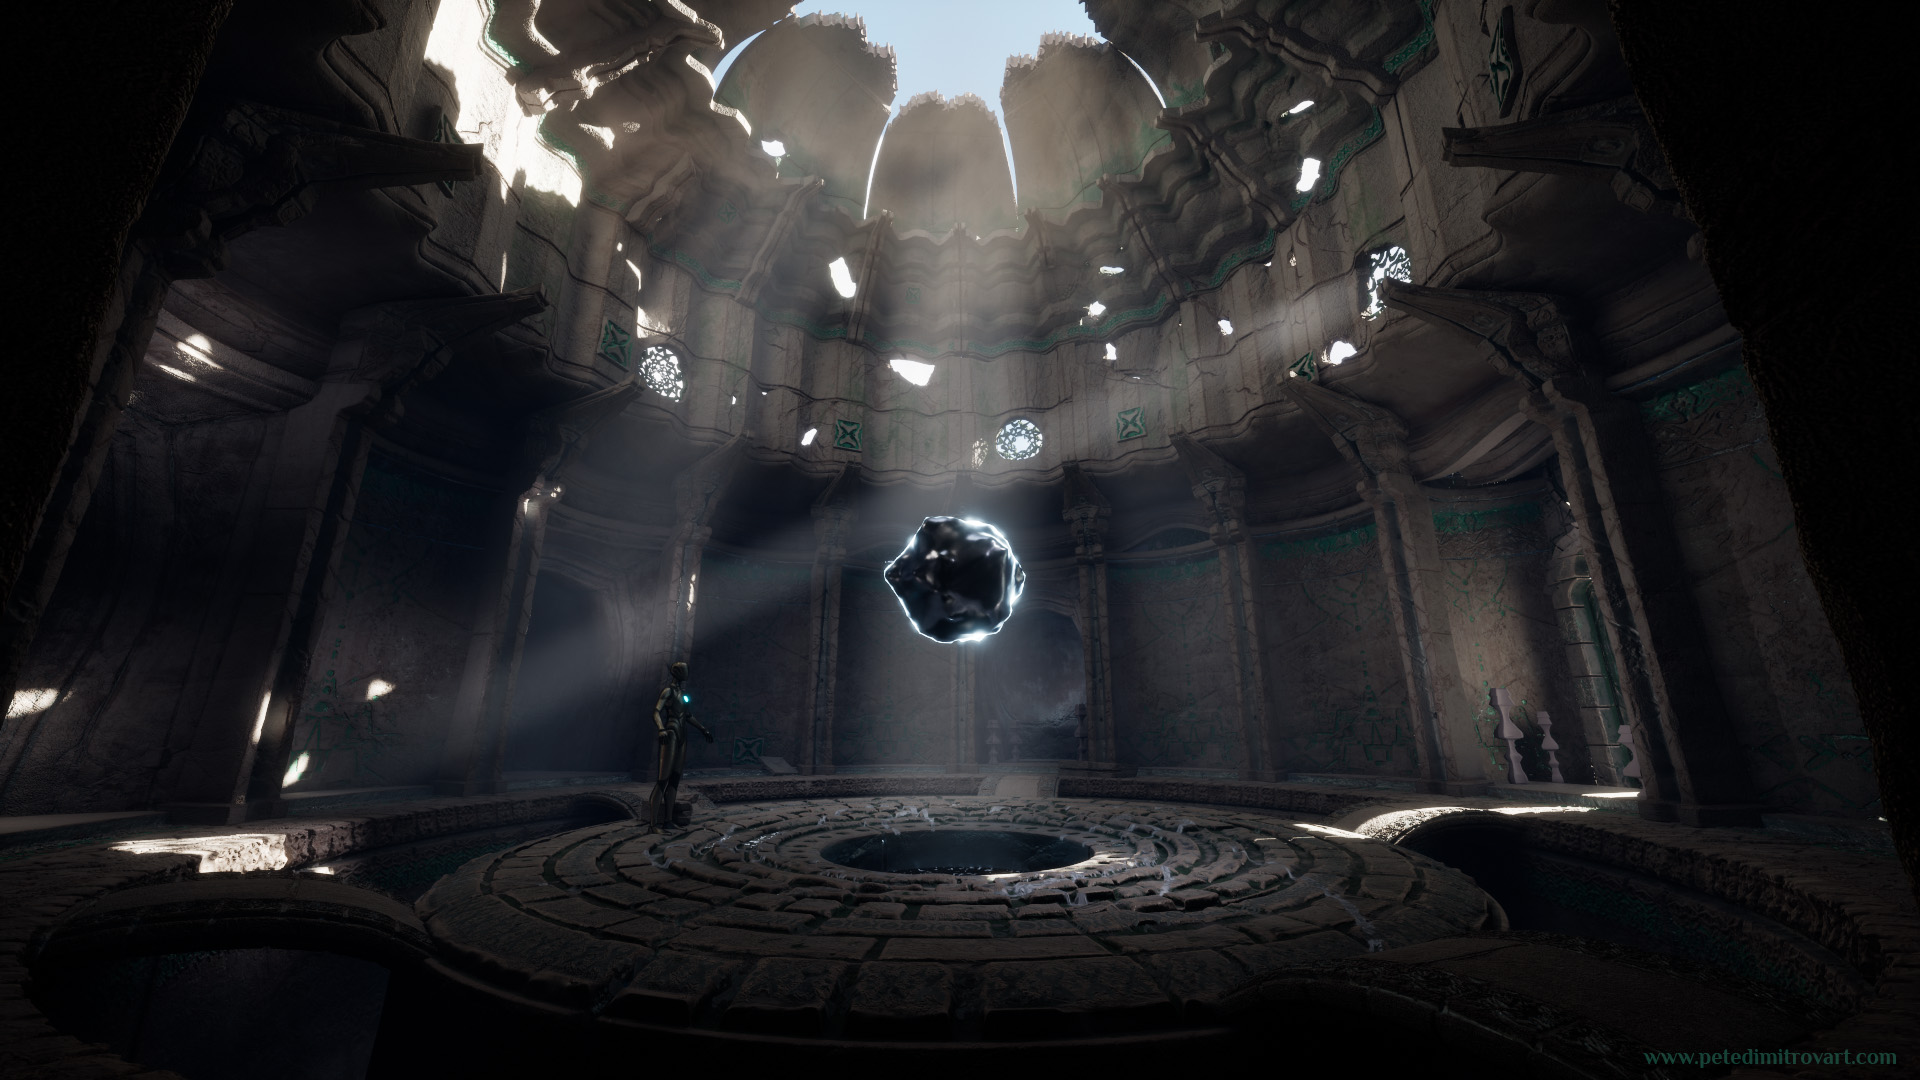
Not only were I testing out the visual and silhouette of the shapes themselves but I also was engaged fully into looking at something else too: their use with light. I wanted to create interesting patterns at the very top that then would flood the lower parts of the environment in light that leaves spellbinding, exciting shadow silhouettes. Here light itself was my main attention and my main “asset”. It dictated what was going to happen with the sculpture pieces. Light inspired me in the making of the flower-like opening on the top.
Having figured what pieces work and what pieces I like from the initial Blender blockouts, I set off to take some of them inside Zbrush. The modular building pieces that I liked I retopologized in Zbrush using Dynamesh. I then further sculpted and polished details on top. Some I duplicated multiple times and shattered in different ways, deriving me extra dressings and details.
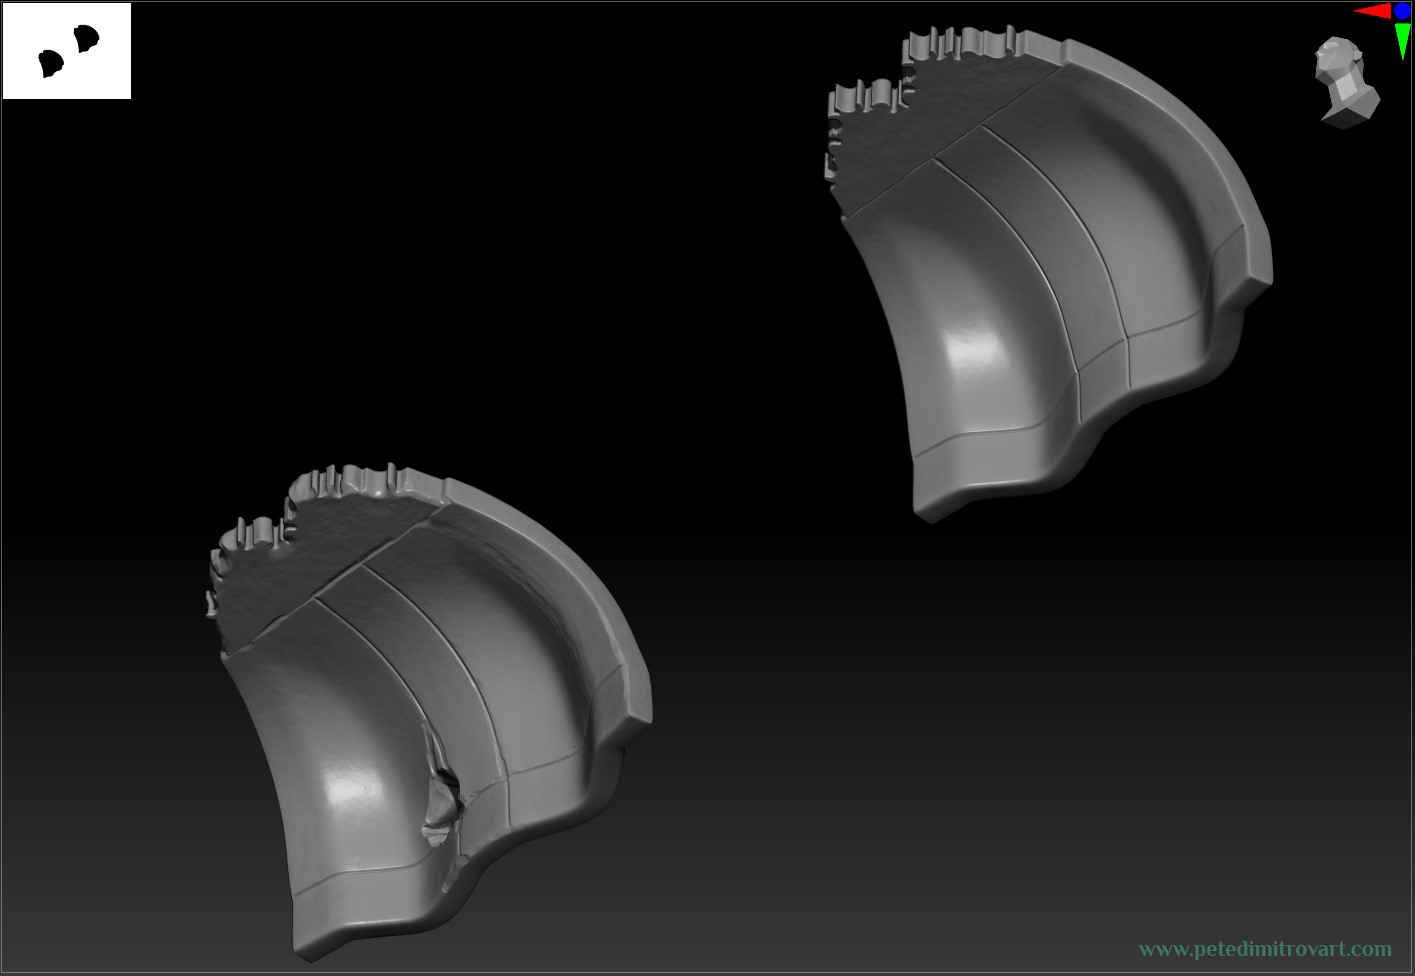
As a final step inside Zbrush I used Decimation Master in order to lower the polycount of each sculpt. I had most pieces sitting at 2-3 million tris. Nanite could handle that but it would result with each mesh being around 200-300 MBs, maybe even more. I found that would be needless given that this high density of poly was not exactly looking more detailed than a well decimated version that would be 100-200k tris (instead of 2-3m). The file sizes of those would be much more manageable.
We need to remember that we need to UV map these too. UV Mapping a 3m triangles sculpt would be much more taxing on Blender (and on us) than a 300k tris one, which would be a trivial task to uv map if one has a polished, good geometry.
Door Asset
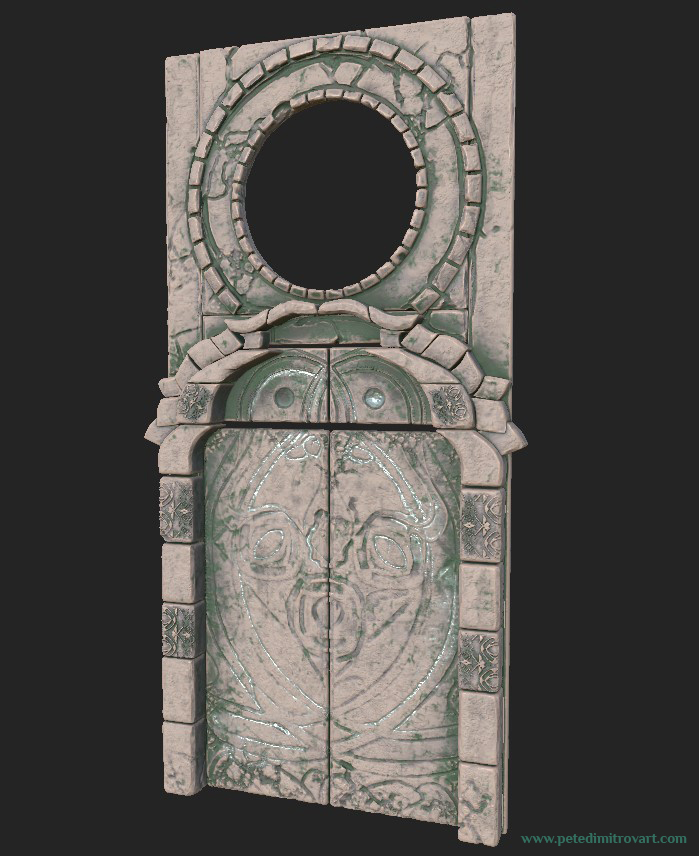
The above described process I used for the creation of the front door as well.

I made a quick shape exploration in Blender before moving anything into Zbrush. I played with an array modifier with rotations in order to try and get some interesting shape. Here I once again thought at light as my main asset, as such I wanted to create some silhouette that once lit would aggressively cast some interesting shadows in the middle of the room.
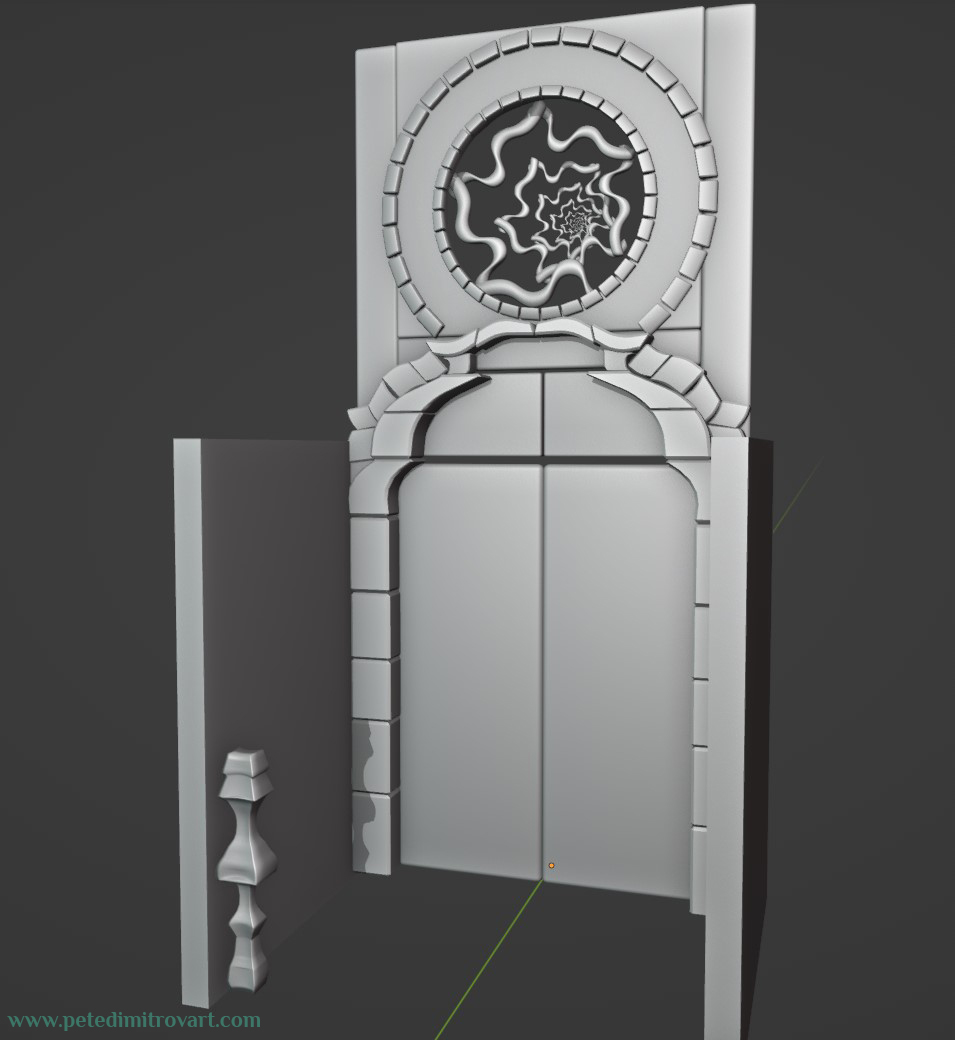
The walls to the left and the right were shapes just for placeholder as I knew I would use the existing modular walls in the project instead of making brand new ones unique to the corridor of this door.
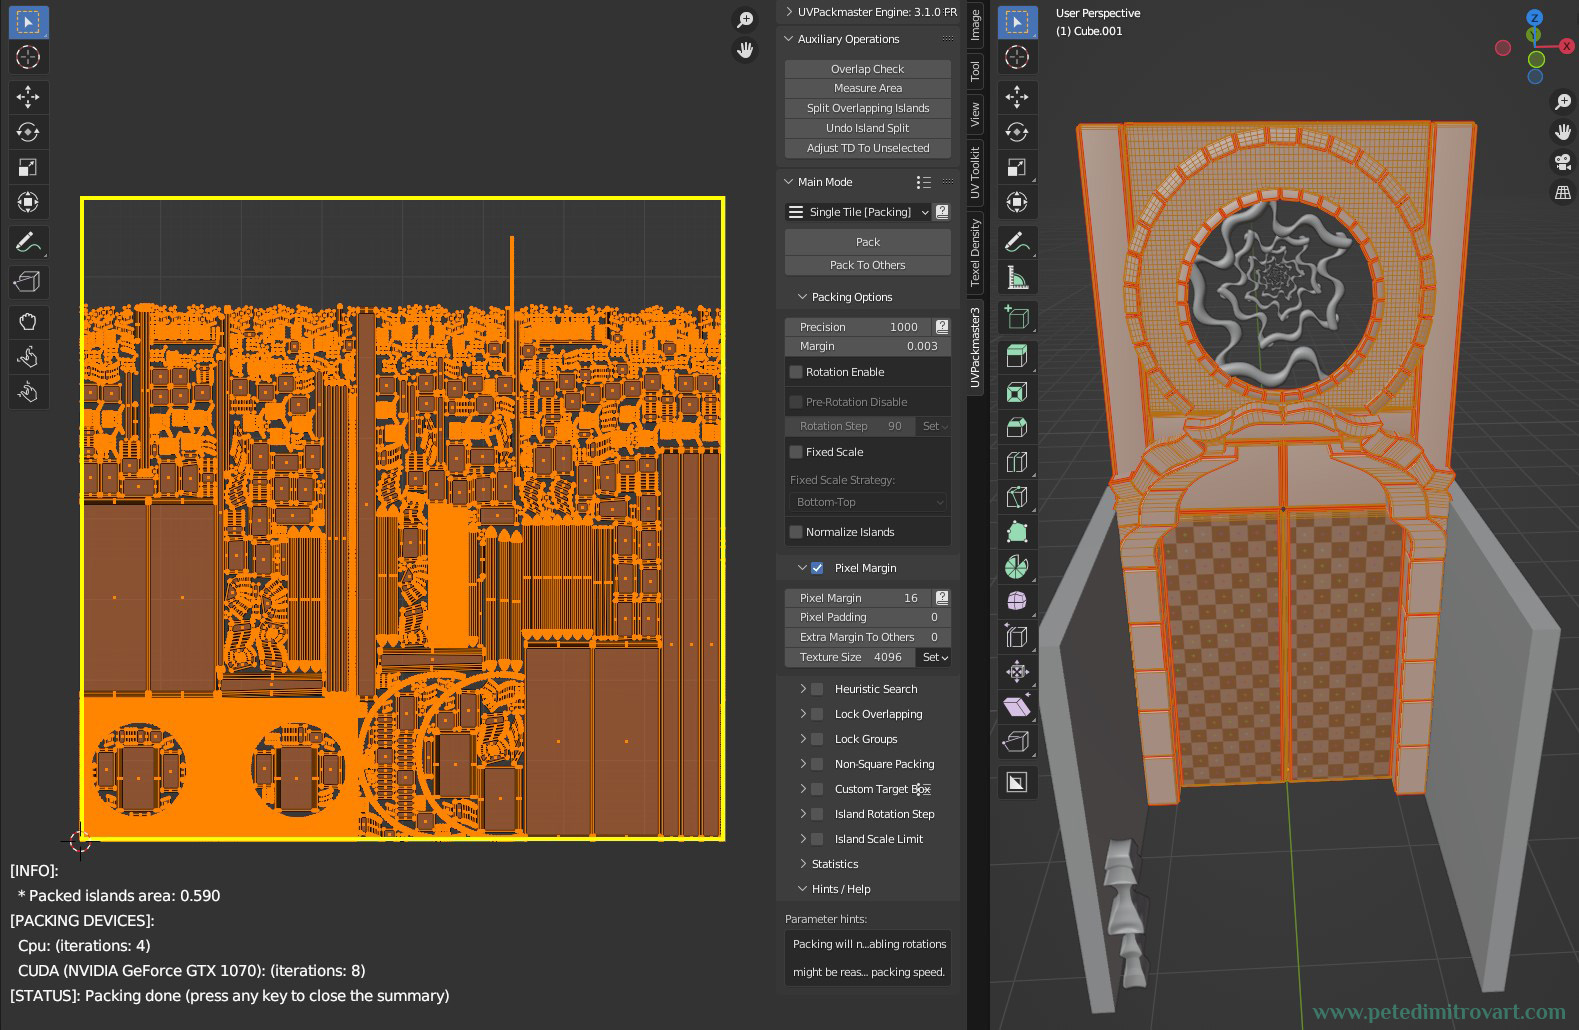
There was slight difference in the process of making this door, when compared to the walls we looked at before. In here, I UV mapped my initial pieces and then in Zbrush used non-destructive approach both to the sculpting and the decimation of the topology by the end. That way I preserved my UV maps and didn’t have to re-map once the sculpts were ready.
This is the same approach I used for the circular platform in the middle.
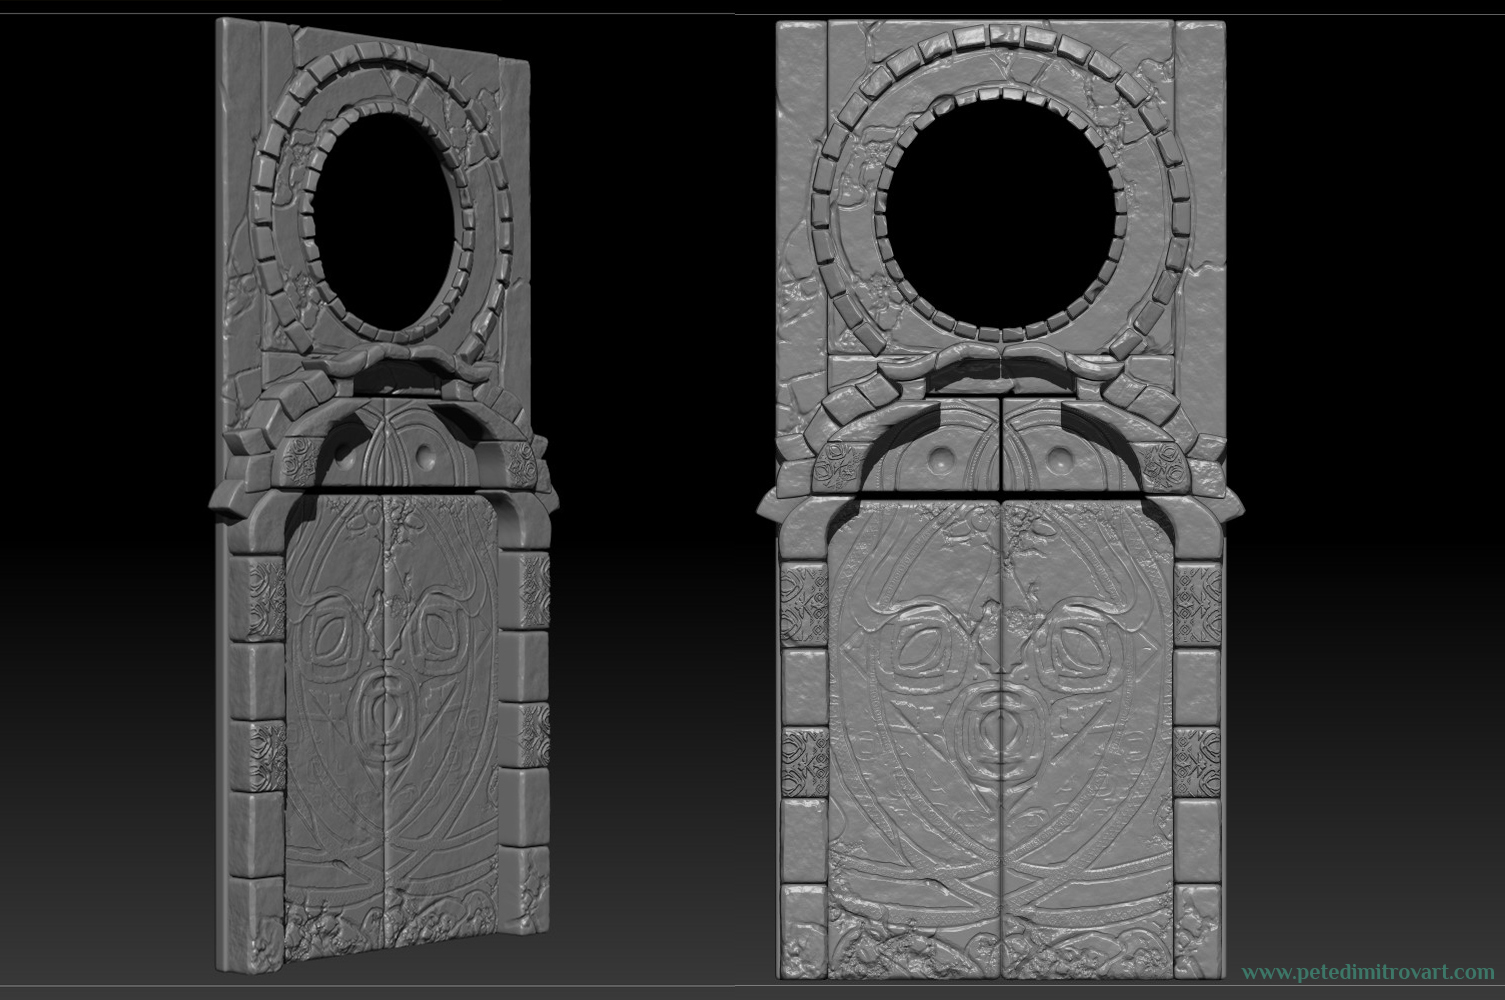
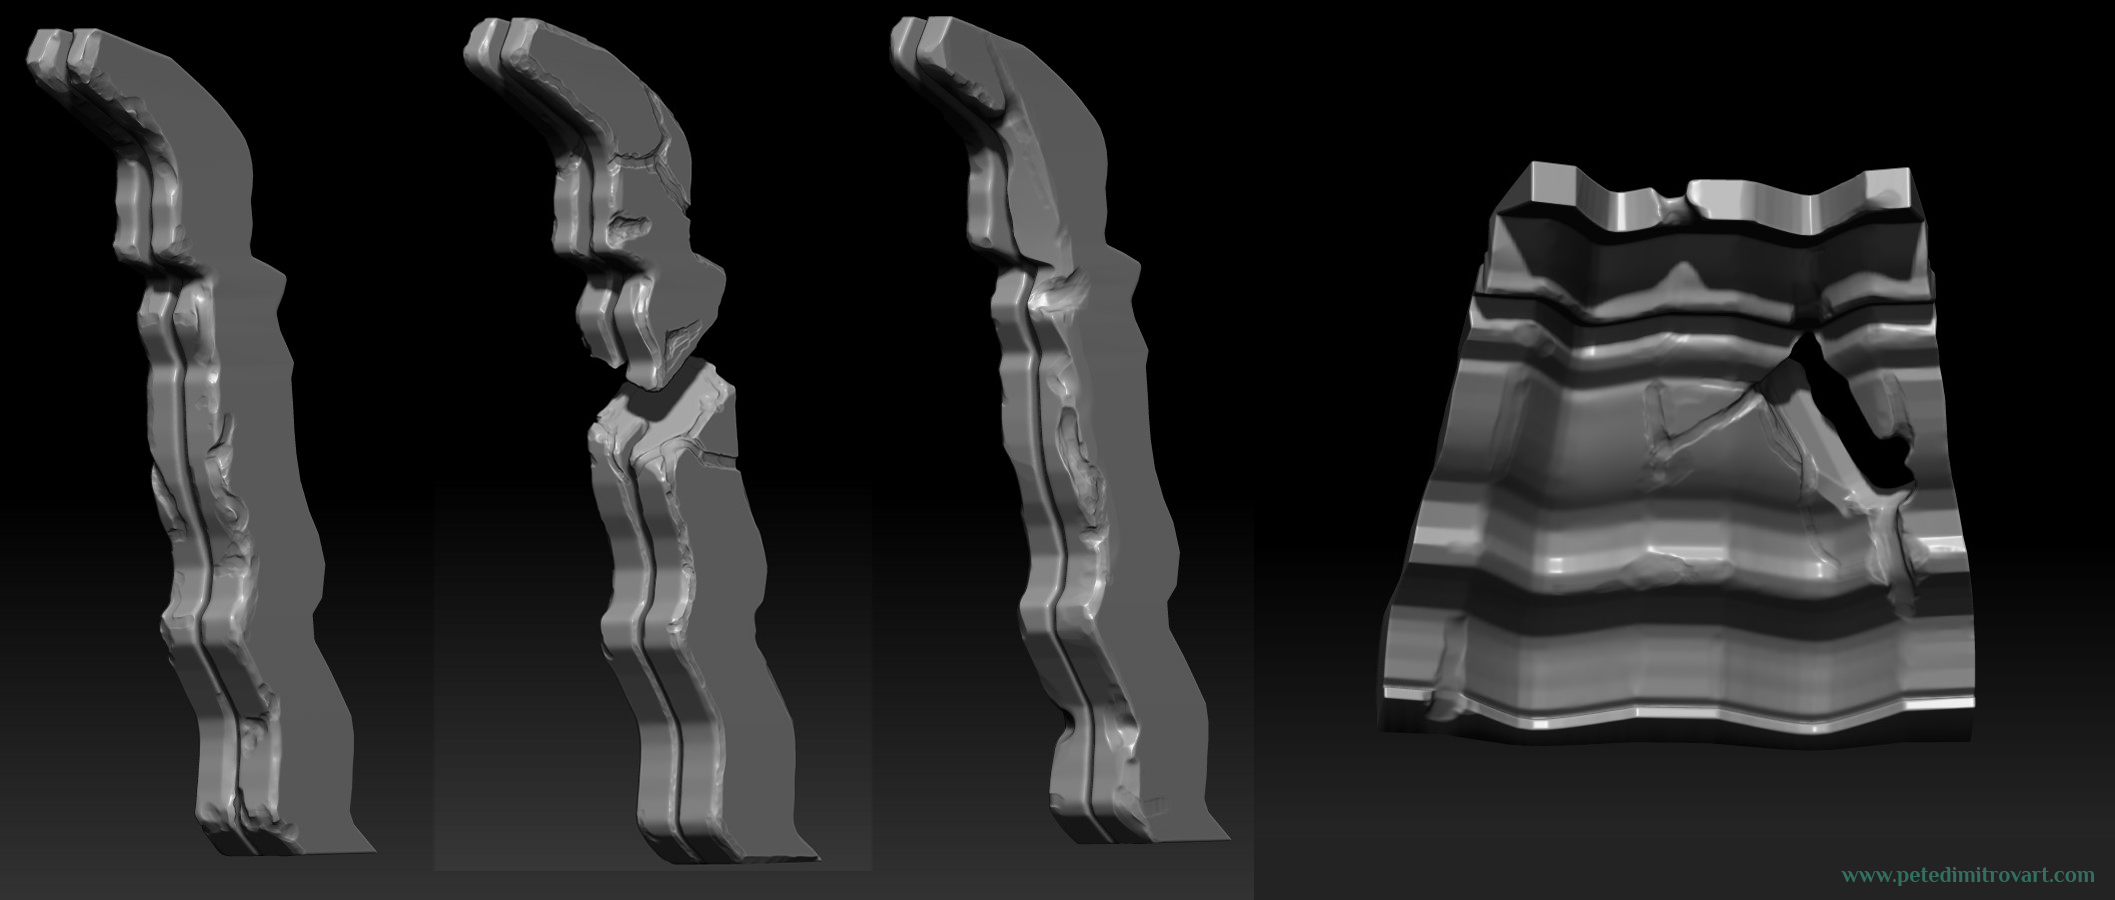
Above is a detailed look at my sculpt pass on the door. I’ve not included the spiral shape as I thought its not necessary to run a sculpting pass on it - instead it could be ordinary Nanite mesh with just a tiling material on top.
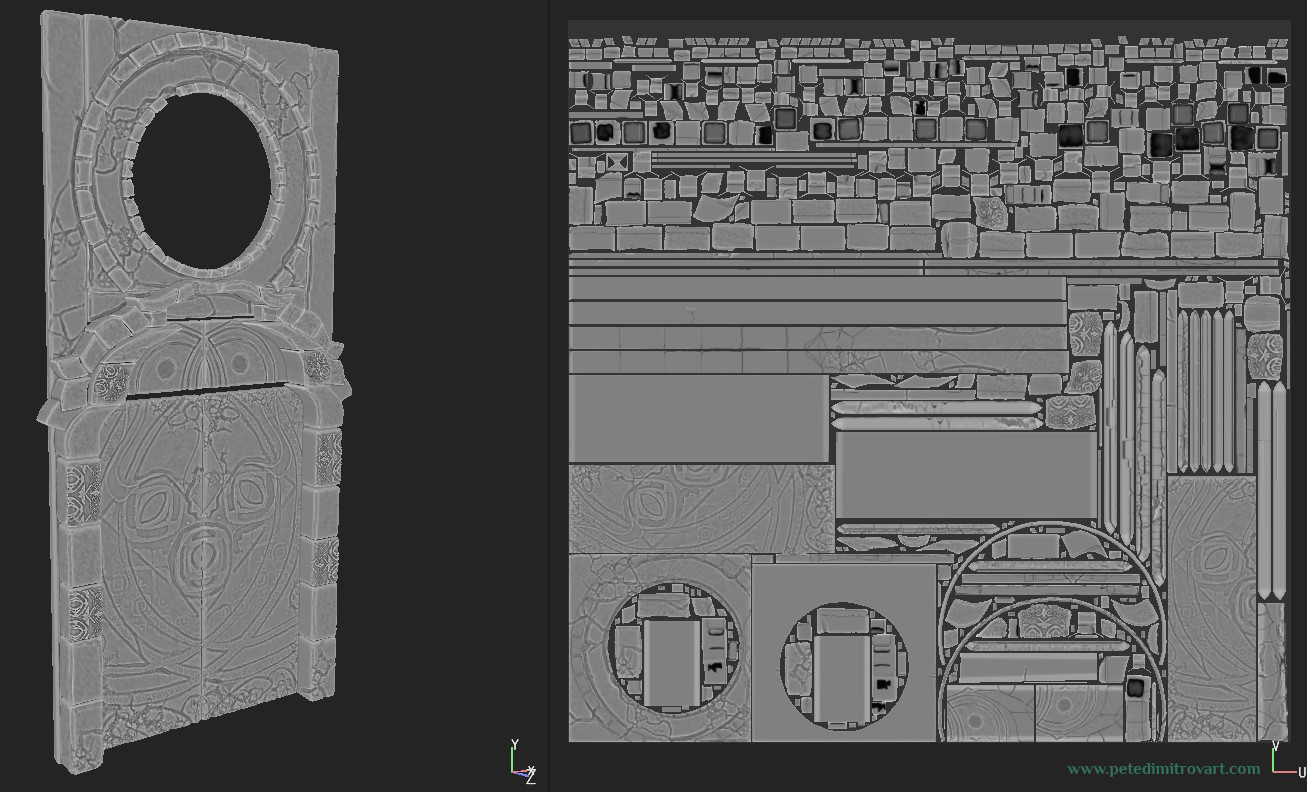
After the sculpt was done I decimated the asset while preserving UVs. I went into Substance Painter where I baked my maps and set off to texture. In the image above the UVs differ slightly compared to the Blender shots before. That’s mainly because I did some extra polish before taking it outside of Blender and into Zbrush. With that I utilized my UV space better to not have the empty space seen in the first Blender UV screenshot.
God Rays Alpha Cards
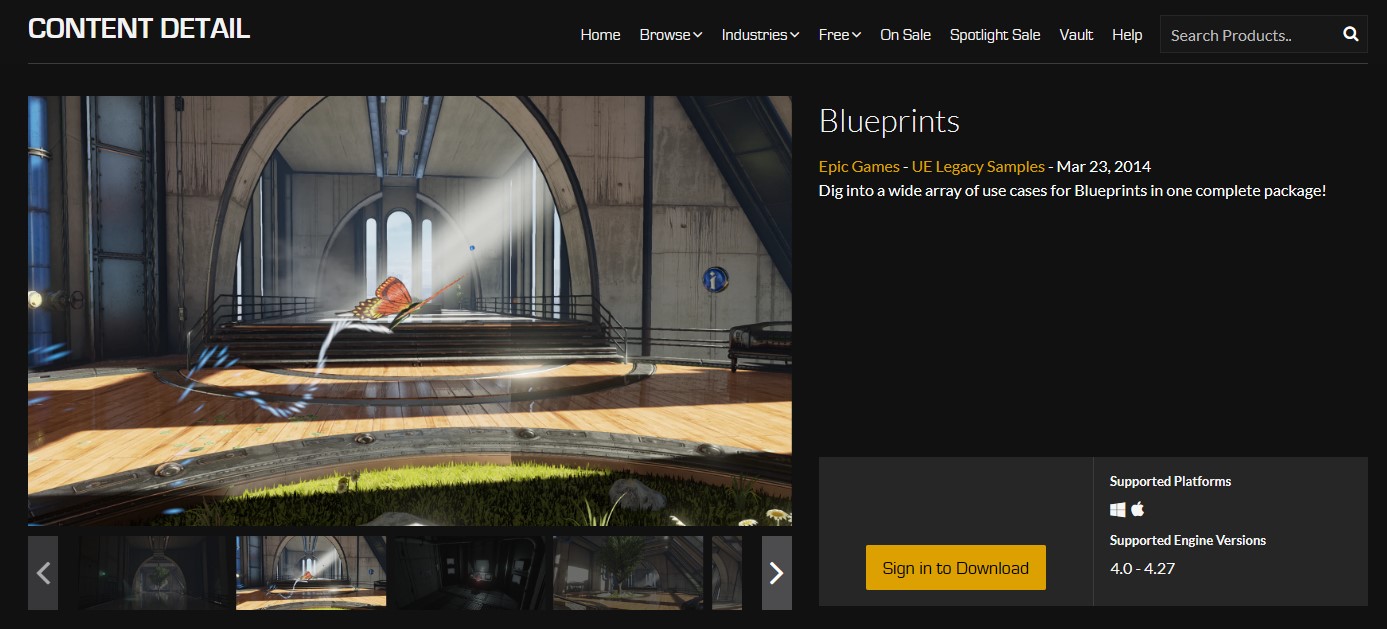
Once the ceiling and the dome appearance was created I put in some god rays and atmospheric 2D alpha cards. Those face the camera at most of the times and if you wanted similar ones you could dig out materials and blueprints set ups from Epic over here - “Blueprints - Legacy UE4 Sample Project”.
This is UE4 and its marked as Legacy in some spots, but the Blueprint set up (and materials) found in there for “God Rays” and “Fog Cards” are set up incredibly well. Their design and function stands perfect even when migrated in UE5.
Roots
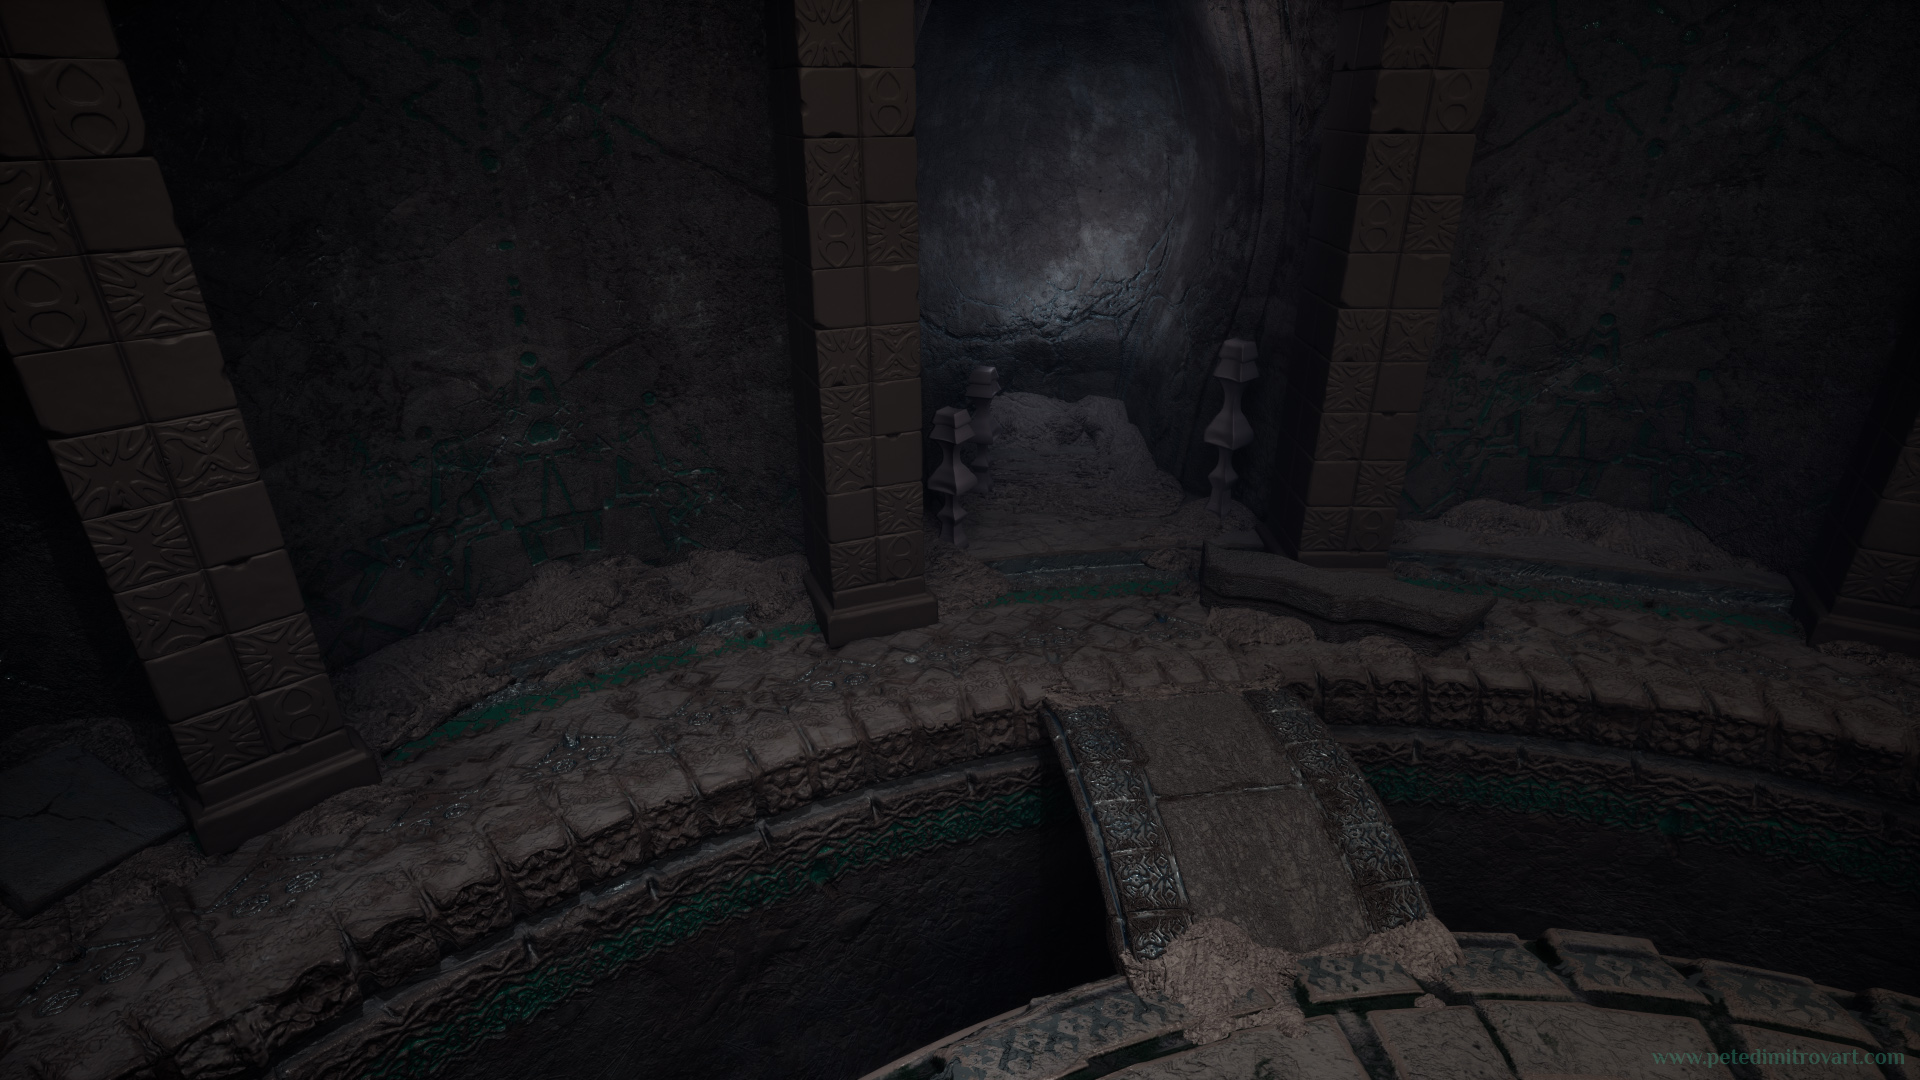
I had the alpha card rays implemented and my attention came back entirely on the lower parts of the scene. Where all of the “action” would take place.
I looked at it and could see that it was sitting predominantly empty. No detail props or set dressings. Even the walls met the floors at a perfect 90 degrees angle which took away from the natural look of the space and made for an artificial CG look.
I wanted to remedy that. As such I looked into making bundles of props I could scatter around and about. Pottery, ground dirt pile, smashed pieces of pots. Stone tablets with inscriptions or symbols on them. Fallen parts of the upper ceiling pillars, now sitting on the dusty floor.
Yet my walls remained empty. Overly simple. The upper parts of the environment had cracks and tons of damages on the walls, spilling in even further light and using that as a detailing asset. But the lower ones? They were mostly intact. Empty. I didn’t want to dig out any holes there because the camera would be seeing straight out of them. That would break immersion, because, as you could guess, the exterior scene is completely empty. As such that idea was a no go.
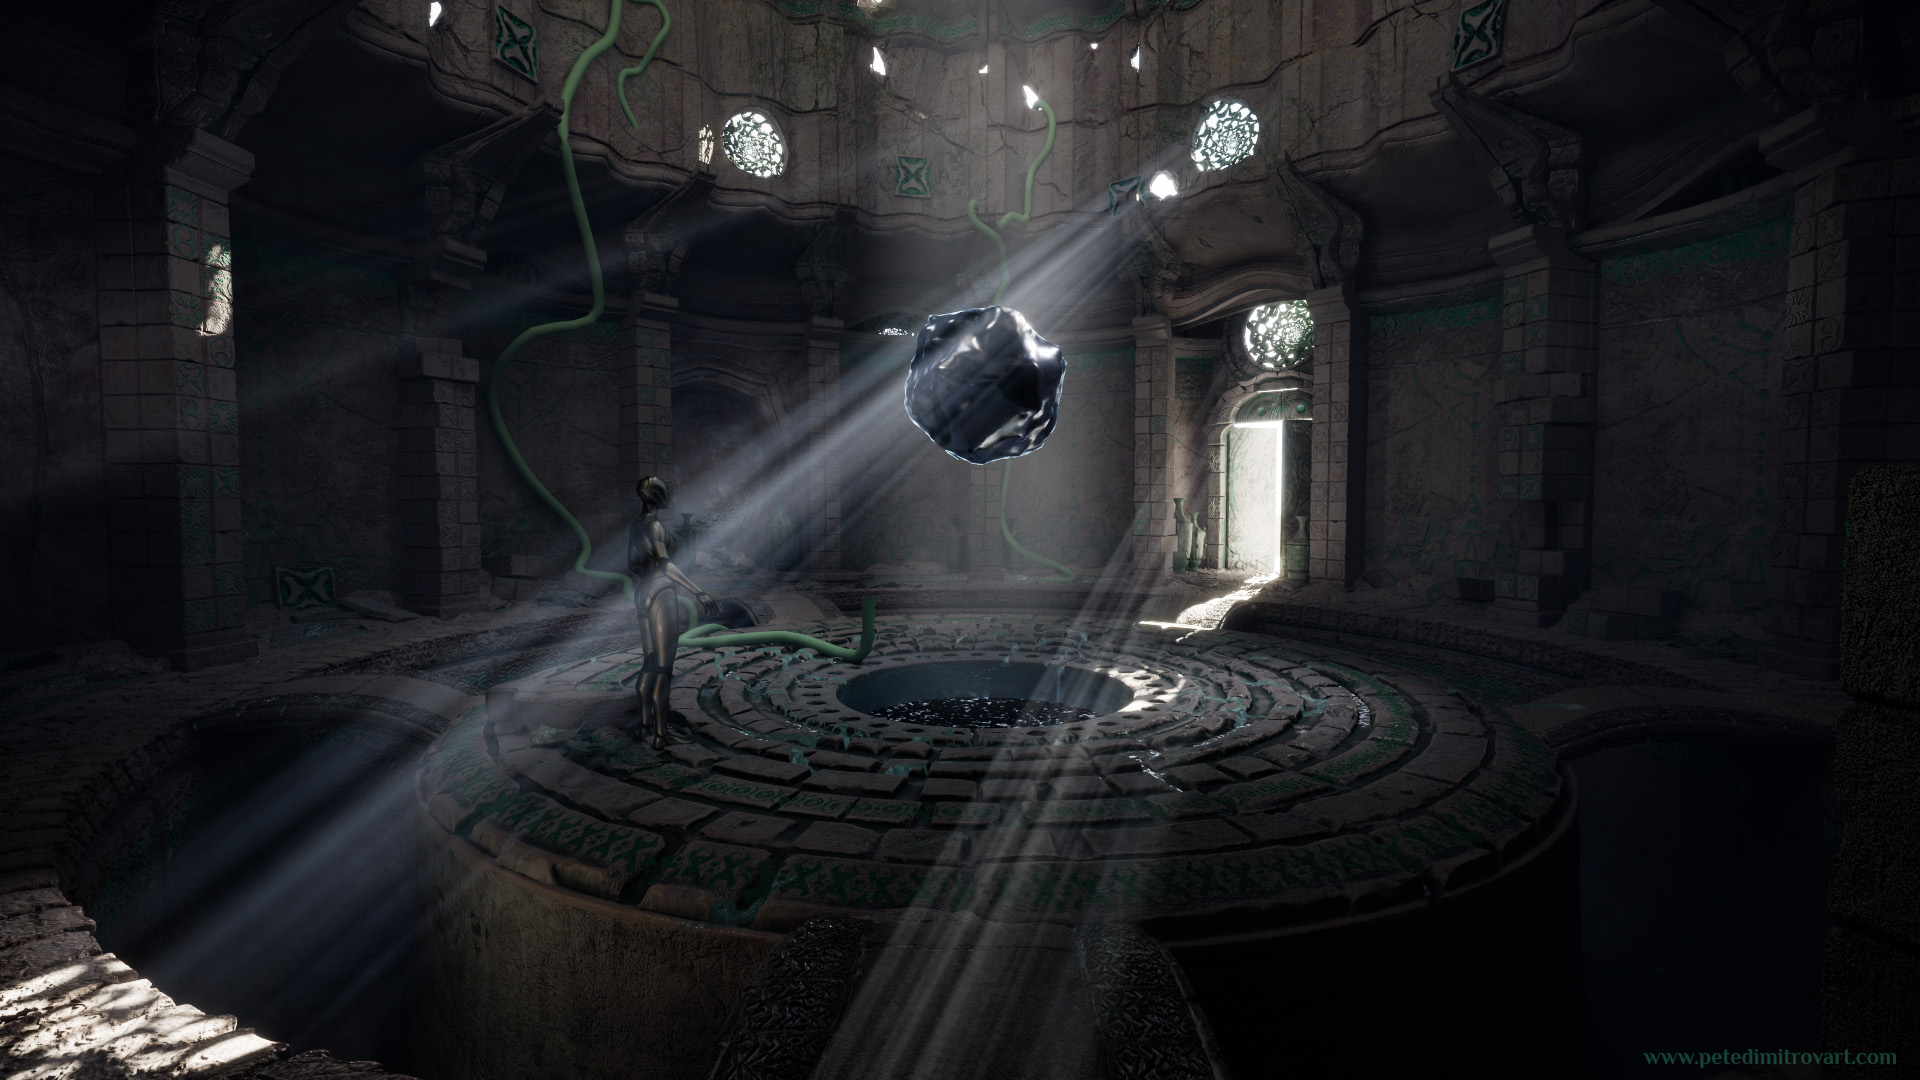
That is when I started thinking about roots. What if oversized, magical, incredibly wide roots were spiraling around like snakes? They could populate the walls better and reach towards the middle of the room, towards the floating orb.
I pitched that idea out loud to my friend Sophie Deschamps. She loved the idea so much, and being the cool artist she is, without me even asking, took the screenshot I had just sent her and painted over it.
She got me this artwork:
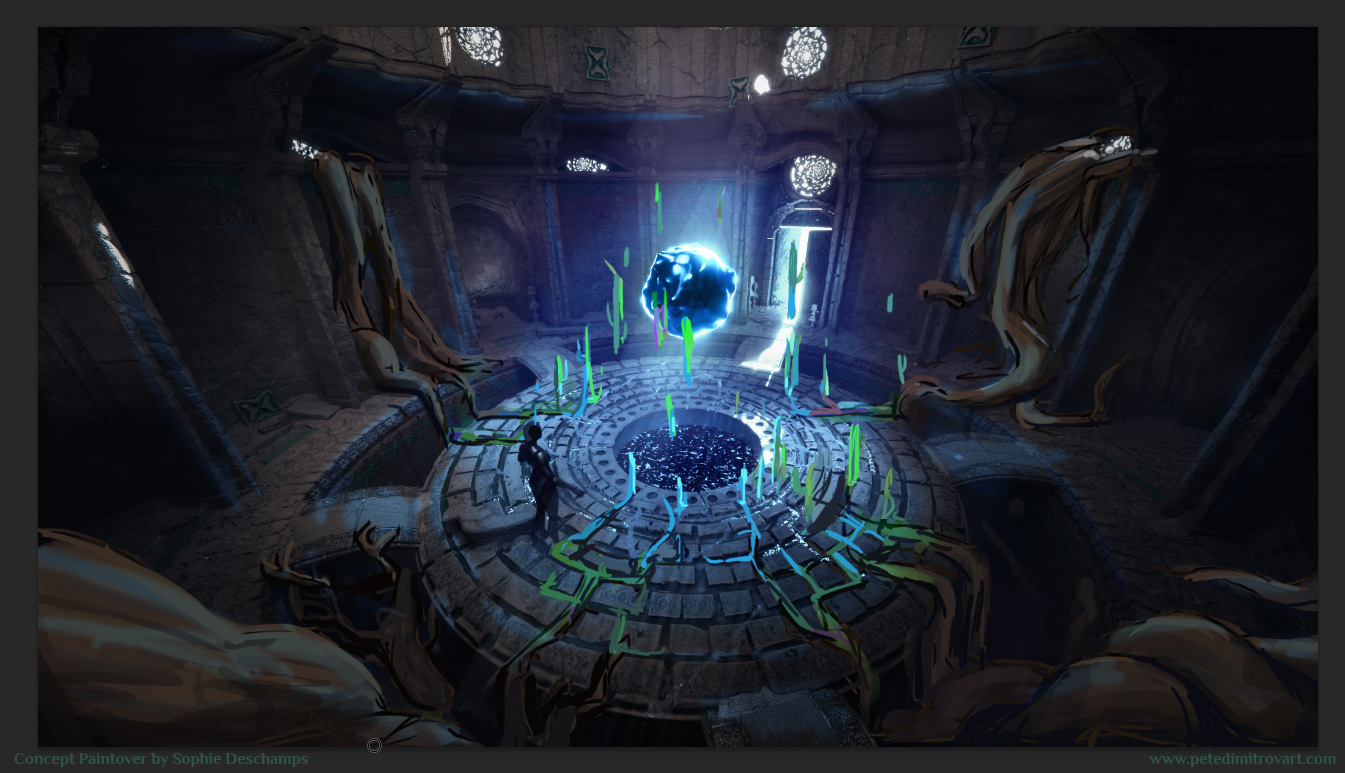
Seeing this concept paint over, I knew immediately. I knew that indeed this is the next move and as such I set of to making some roots.
I could not describe how helpful and inspiring this paint over was, as such, thank you, Sophie!
Blueprints for the Roots
My process behind making the roots was at first in big chunk in UE5 itself. The space is already blocked out and I wanted to have a direct and immediate way to “crawl” around different roots and see their influence and shape on the environment. As such I used a spline system Blueprint directly in UE5.
I could have opened Blender and positioned my floor and walls in the configuration I have in the scene. That would be a trivial and not very time consuming task as I already have all of my measurements set. Its just a matter of moving them from one place to another.
Yet I dislike jumping in and out of Unreal. I like doing as much as I could in the engine itself as that then keeps my art process with less friction. Frictionless means more creativity and energy spend towards whatever I am creating and not the dialogue that I have between the different software packages.
(Youtube embedded video above, showcasing a tutorial titled “UE4 Tutorial: Add spline-meshes procedurally”. I don’t know the YouTuber but this video, even though old, is very useful.)
(Video above is UE4 but things seen in it should work well in UE5 too. If some parts are hard to follow, I suggest giving a go to this one instead - “Unreal Engine 4 Tutorial - Splines - Spline Meshes”. I remember using that at one point or another as well.)
Not wanting to move between modelling packages, as mentioned already, I imported in UE5 a Blueprint system I had made years prior. It’s one that I had started for some random UE4 project I could not even remember now (tutorials for making similar blueprint are seen in the videos above).
Over time I had carried it into my Orbital Gateway, (found here) where I had used it to scatter in line all of the metal platforms. It was also used to shape all of the big, vacuum like cables that are the kernel of the vision of that project. In that Gateway environment I had implemented some improvements into my initial spline Blueprint too. Things like being able to per instance basis pick different static mesh and different material to go onto the spline. It was a solution battle tested and as such I wanted to reuse it here.
I went in Blender and I made an initial tube that I kept higher in poly than I usually do (as in with extra edge loops). Using Unreal 5 now, unlike back in my previous projects that were Unreal 4, here I could afford higher polycount with the knowledge that all of my blocked out pieces will end up being Nanite meshes.
That tube I put into the spline Blueprint. Over the course of a few days I slowly build up bundles of large roots. Those were blockout so if any when taking a turn in the world were looked lowpoly, or any surface got distorted, it didn’t matter. I wanted to block them out directly in UE5 but I still had in mind exporting the resulted meshes back into Blender in order to polish the visual slightly and UV map them by the end.

It’s good to mention that I’ve not implemented control over the thickness of my splines on per spline point basis. As such I could not select a middle point of a root and scale it up to give it thickness. Instead I exported my uniformly thick roots from Unreal.
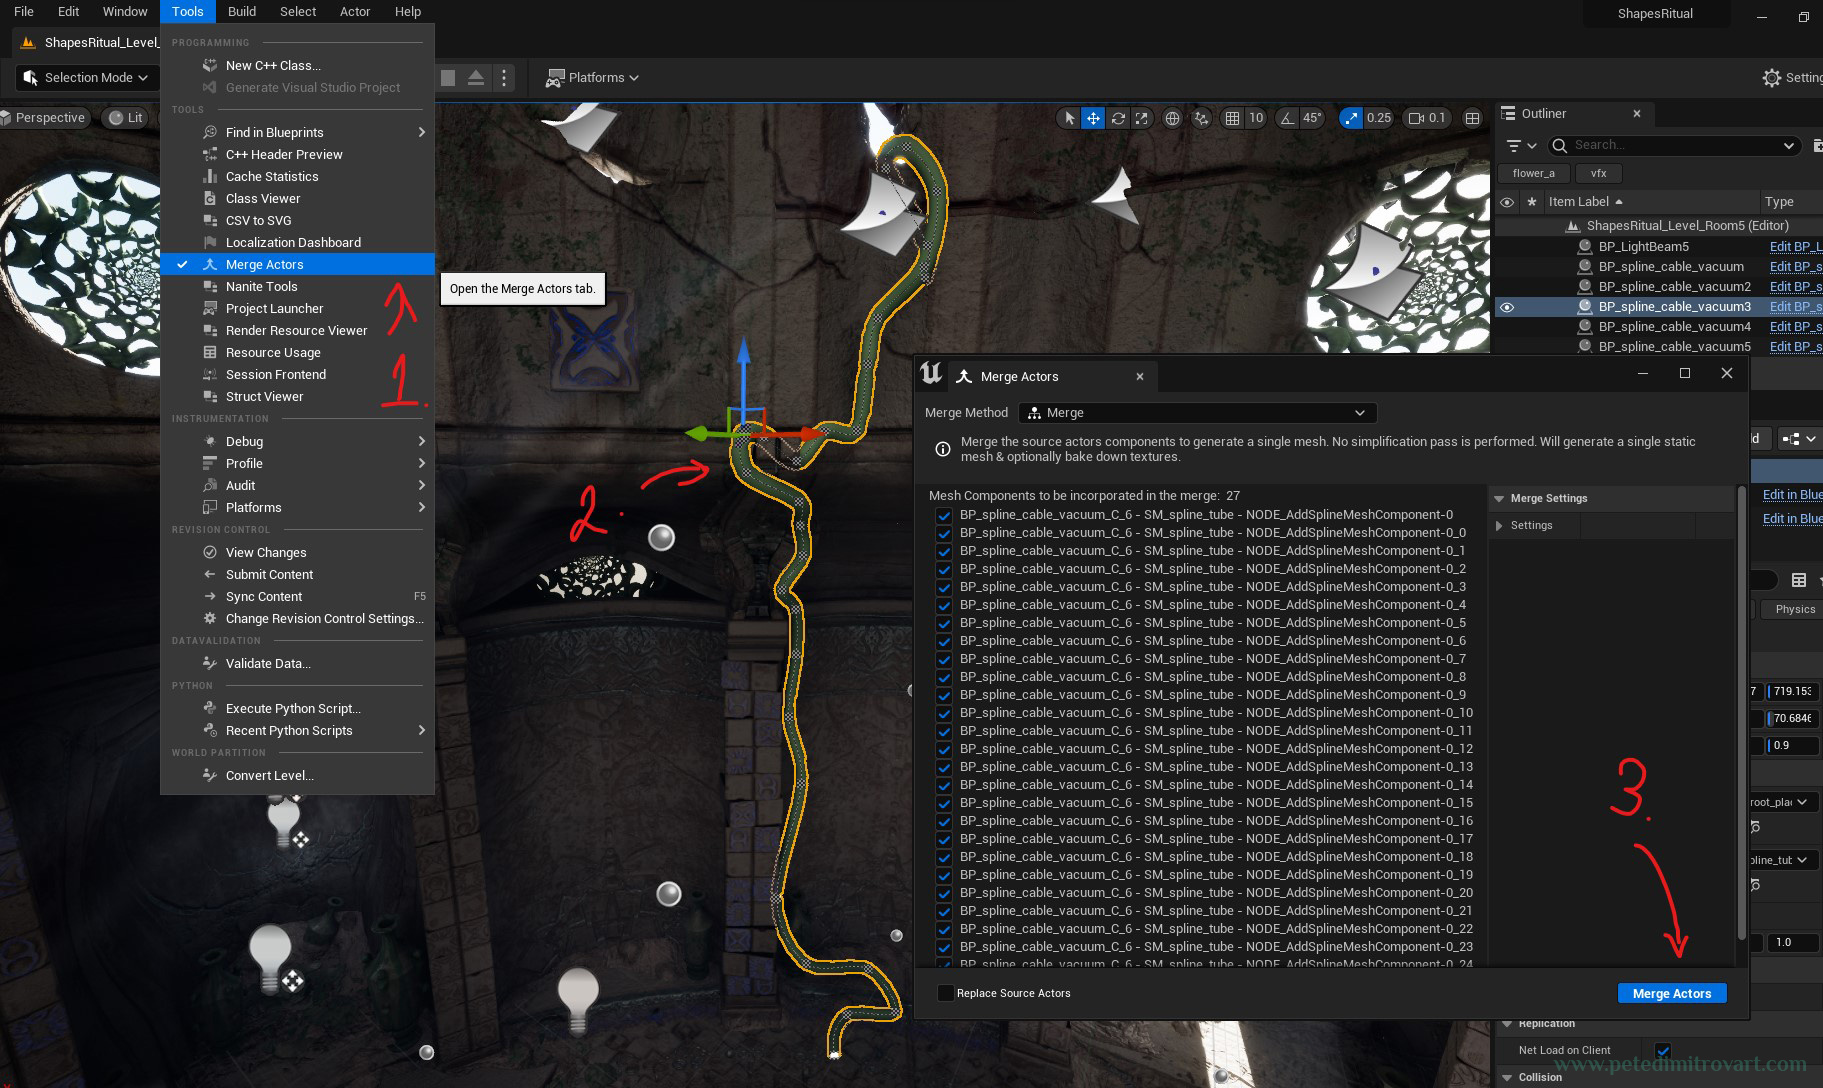
First step to do that was to Merge Actors by selecting the spline - opening “Merge Actors” from the Tools submenu - hitting “Merge Actors” (you can see that in the image below).
That would ask me a location to save the spline as a static mesh under the Project Directory. I then navigate to it in the Content Browser, right click on its icon and go to - Asset Actions - Export. That allows me to save the resulting mesh outside of UE5 as an *.fbx. I open that in Blender and I do my thickness scale up polish, UV polish, and subdivision to make it even smoother Nanite mesh. I import that back into UE5 and I replace the original spline blueprints.
In the paint over from Sophie the roots were incredibly large and impressive. I slowly build up mine to be large too. But I knew I will probably keep them smaller than her concept. I took that decision with the idea of keeping the focal point to be the orb. I thought that if I introduced roots that were very, very thick, they would draw viewers attention. Also I though that if indeed they were that big, I would need to figure out some set dressings and props to put on their surface, as to not leave them too bare, empty, boring and lacking detail.
Filling up the Empty Parts
With those roots looked at, we could take one step back and see the build up of set dressings in one corner of the environment. That way you could get a better perception of how all of the described details and props added up to build up the picture.
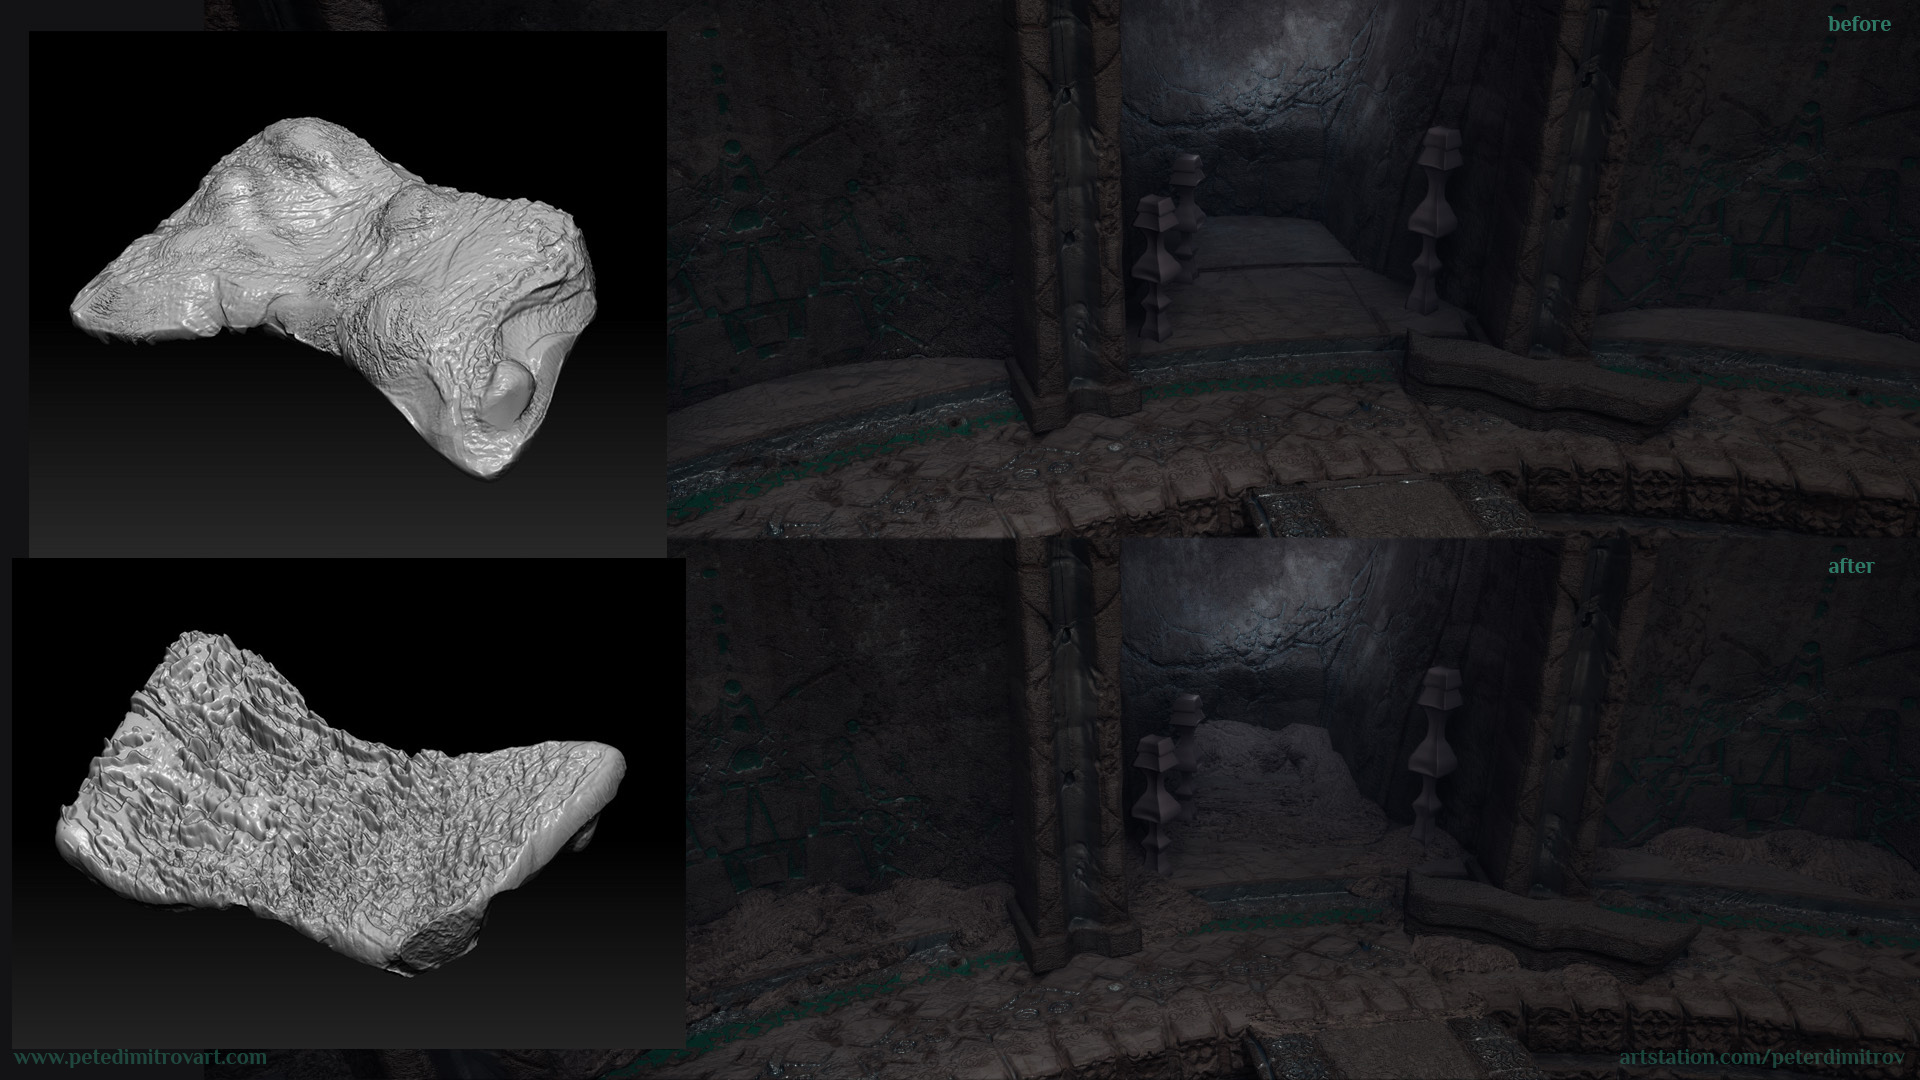
Image above shows a dirty looking Zbrush sculpt I made. It looks not that amazing in the Zbrush render, but once placed in the world with a tiling ground dirt material, to match the floors already there, it helped hide the 90 degrees I mentioned some time ago.
I then polished and revamped the pillars (image above). I wanted to give them better shape and texture. Something more realistic and intricate than the first draft. I also added pottery.
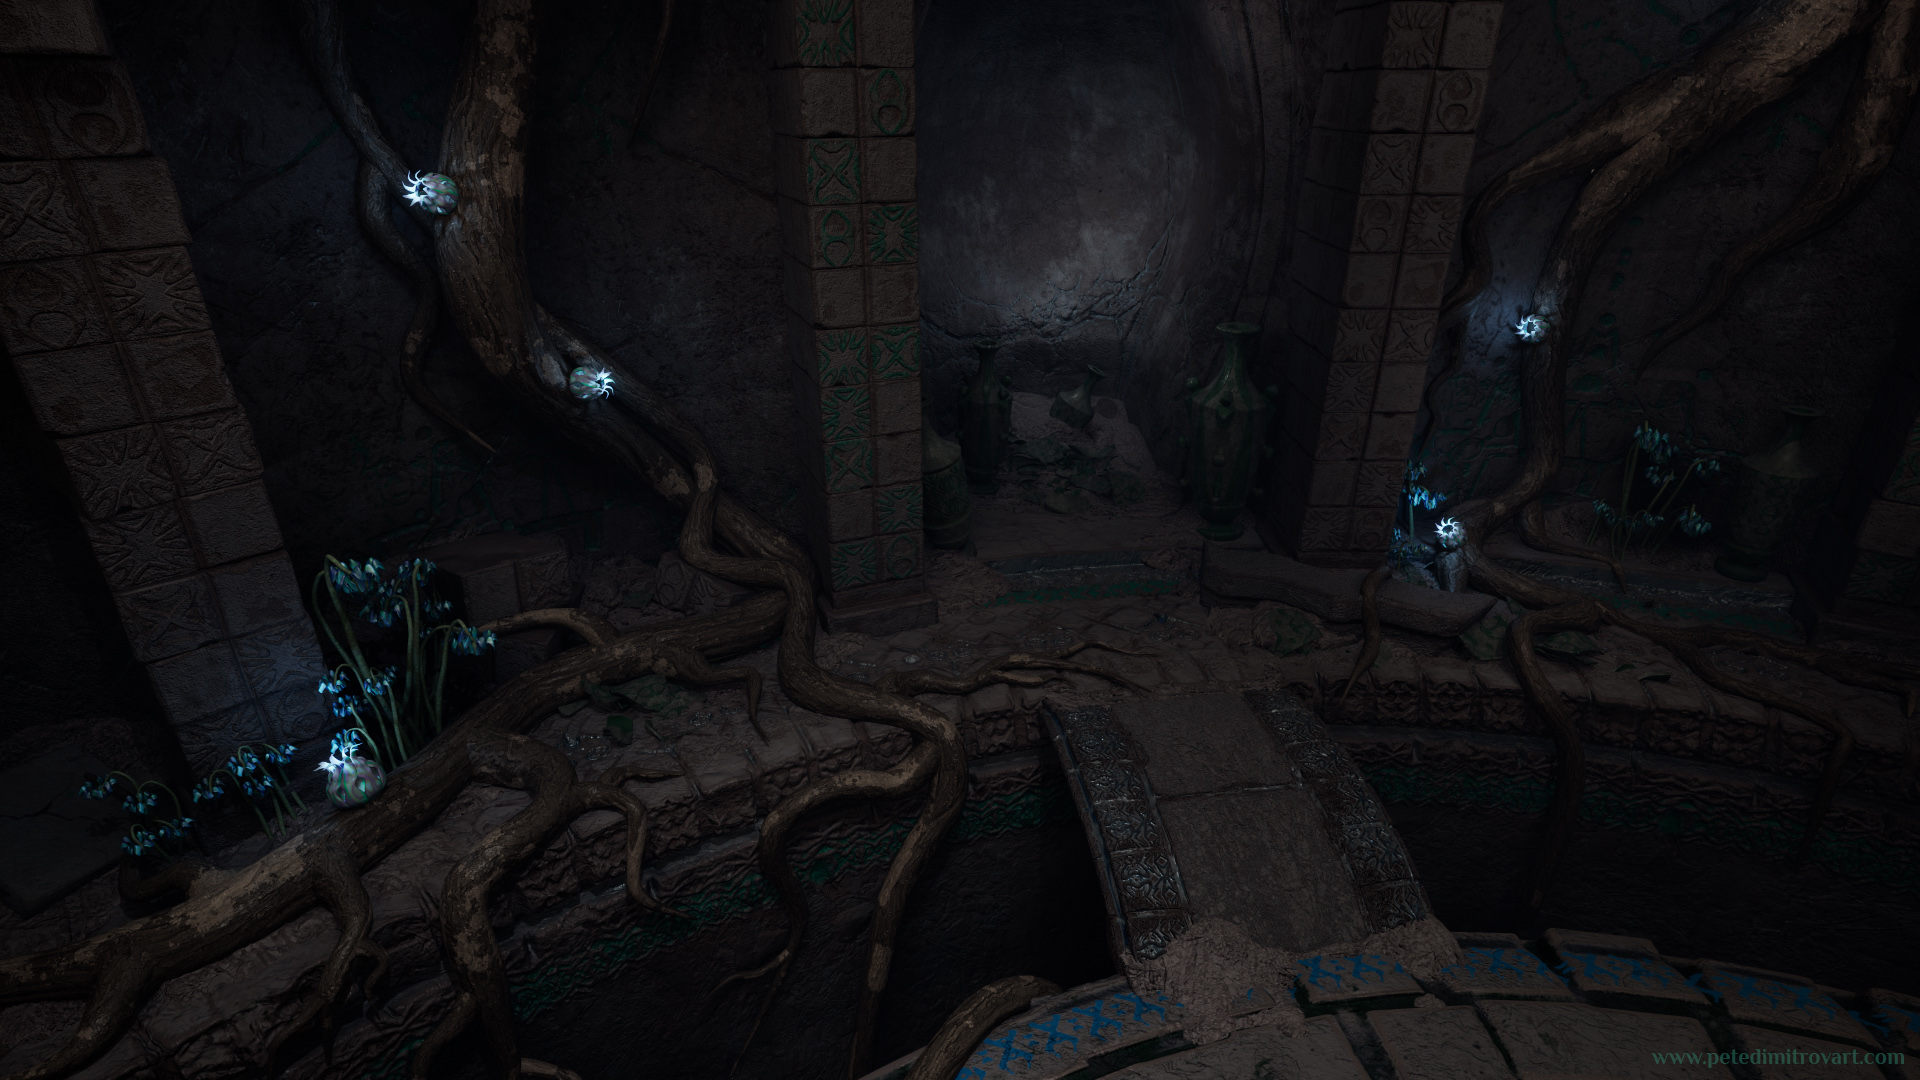
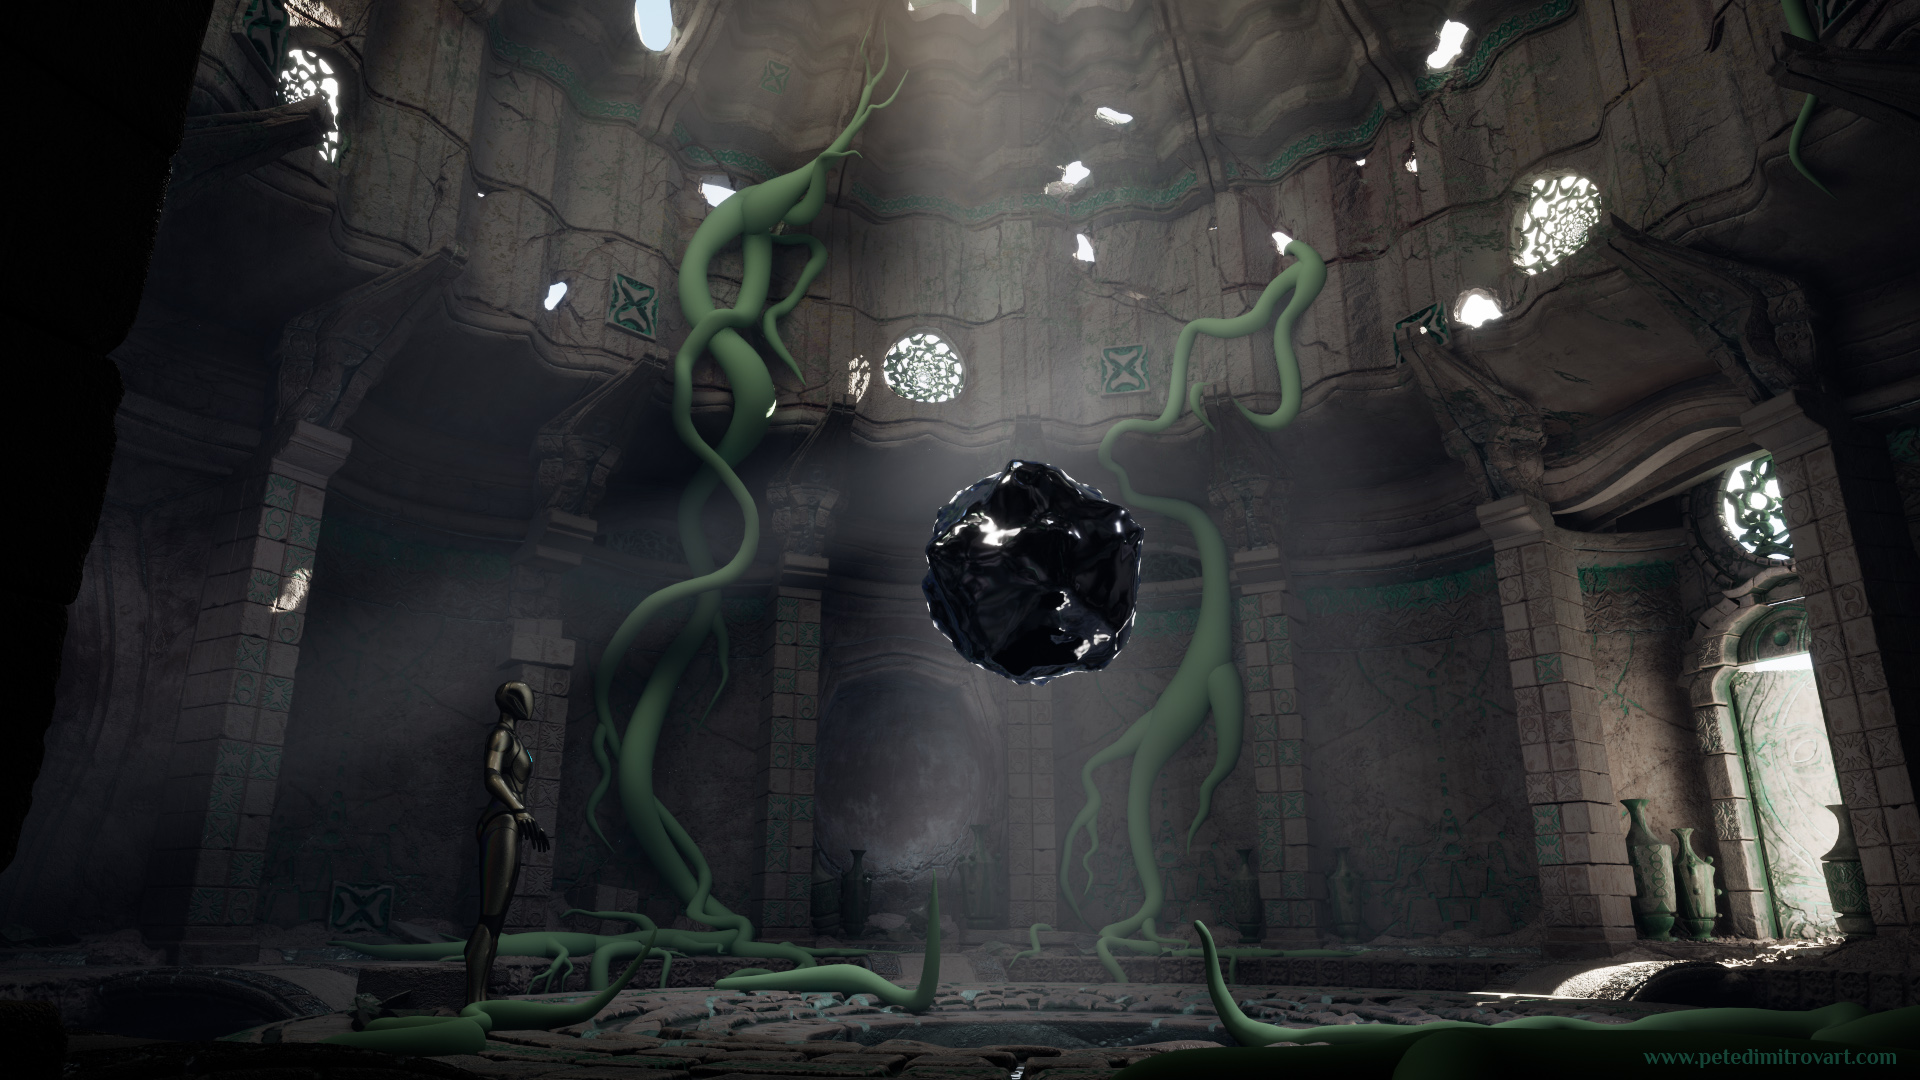
Here we can see the influence of the roots. I textured them using tiling materials from Megascans that I mixed in my own way using triplanar mapping in my UE5 shader. There is also a slight jump with me introducing some foliage and flower pods, but we will go into describing that process in the next post.
Credits
Sophie Deschamps, who did the paint over seen in this entry, is a Level Artist at Ubisoft Montpellier. You can find and follow her work over at Twitter and Artstation.
Conclusion
In this post we saw the scene fill up with props, dressings and more detail. We looked at using Blueprints spline systems for blocking out roots directly in UE5.
There was, however more going on during, and immediately after everything seen above. It was experiment and struggle with color that persisted for a little while.
I attempted different color combinations where the roots flower blooms would light up the scene in blues, purples, reds, oranges. The orb would carry on that color in its fresnel too. Experimenting and switching between those colors went on for a while and then I got some ideas and help from another friend, just the way Sophie helped and inspired me with the roots.
Next up we will look at that and how that influenced changing the orb in the middle for something else.
Cheers,
Pete.
If you enjoyed this blog post, consider subscribing in the form below. That way you will get a notification the next time I publish a new blog.