Update
Hey everyone. Quick update with a few things in my scene.

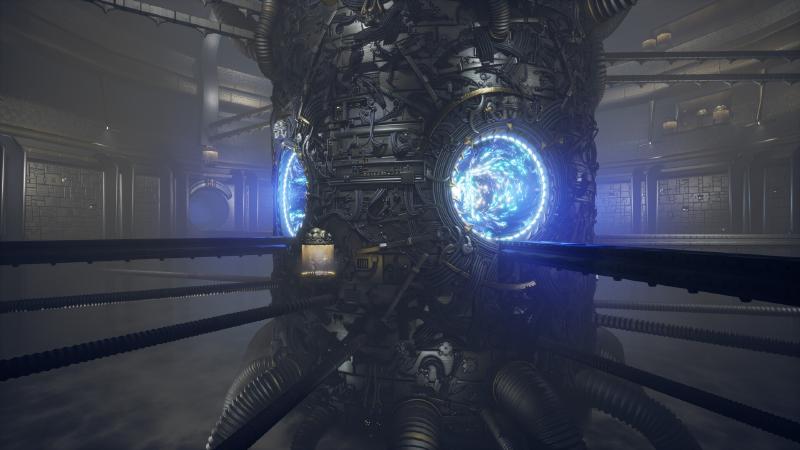
Visually, I spent my attention on mainly two things. First was working on the platforms that the humans sit on. I created a proper mesh to replace the previous placeholder. I also made a material with gradient I can tweak and put colors and noises on top of in order to get that force field effect. I experimented with a few colors for it but ultimately ended up with the one like in the original concept.

I then moved onto the background once again. I tried to improve the protrusion bits I had placed previously. I wanted the hard surface to look proper and as if part of the room and like weld metal, as opposed to the previous golden supports that looked just like clipped through.
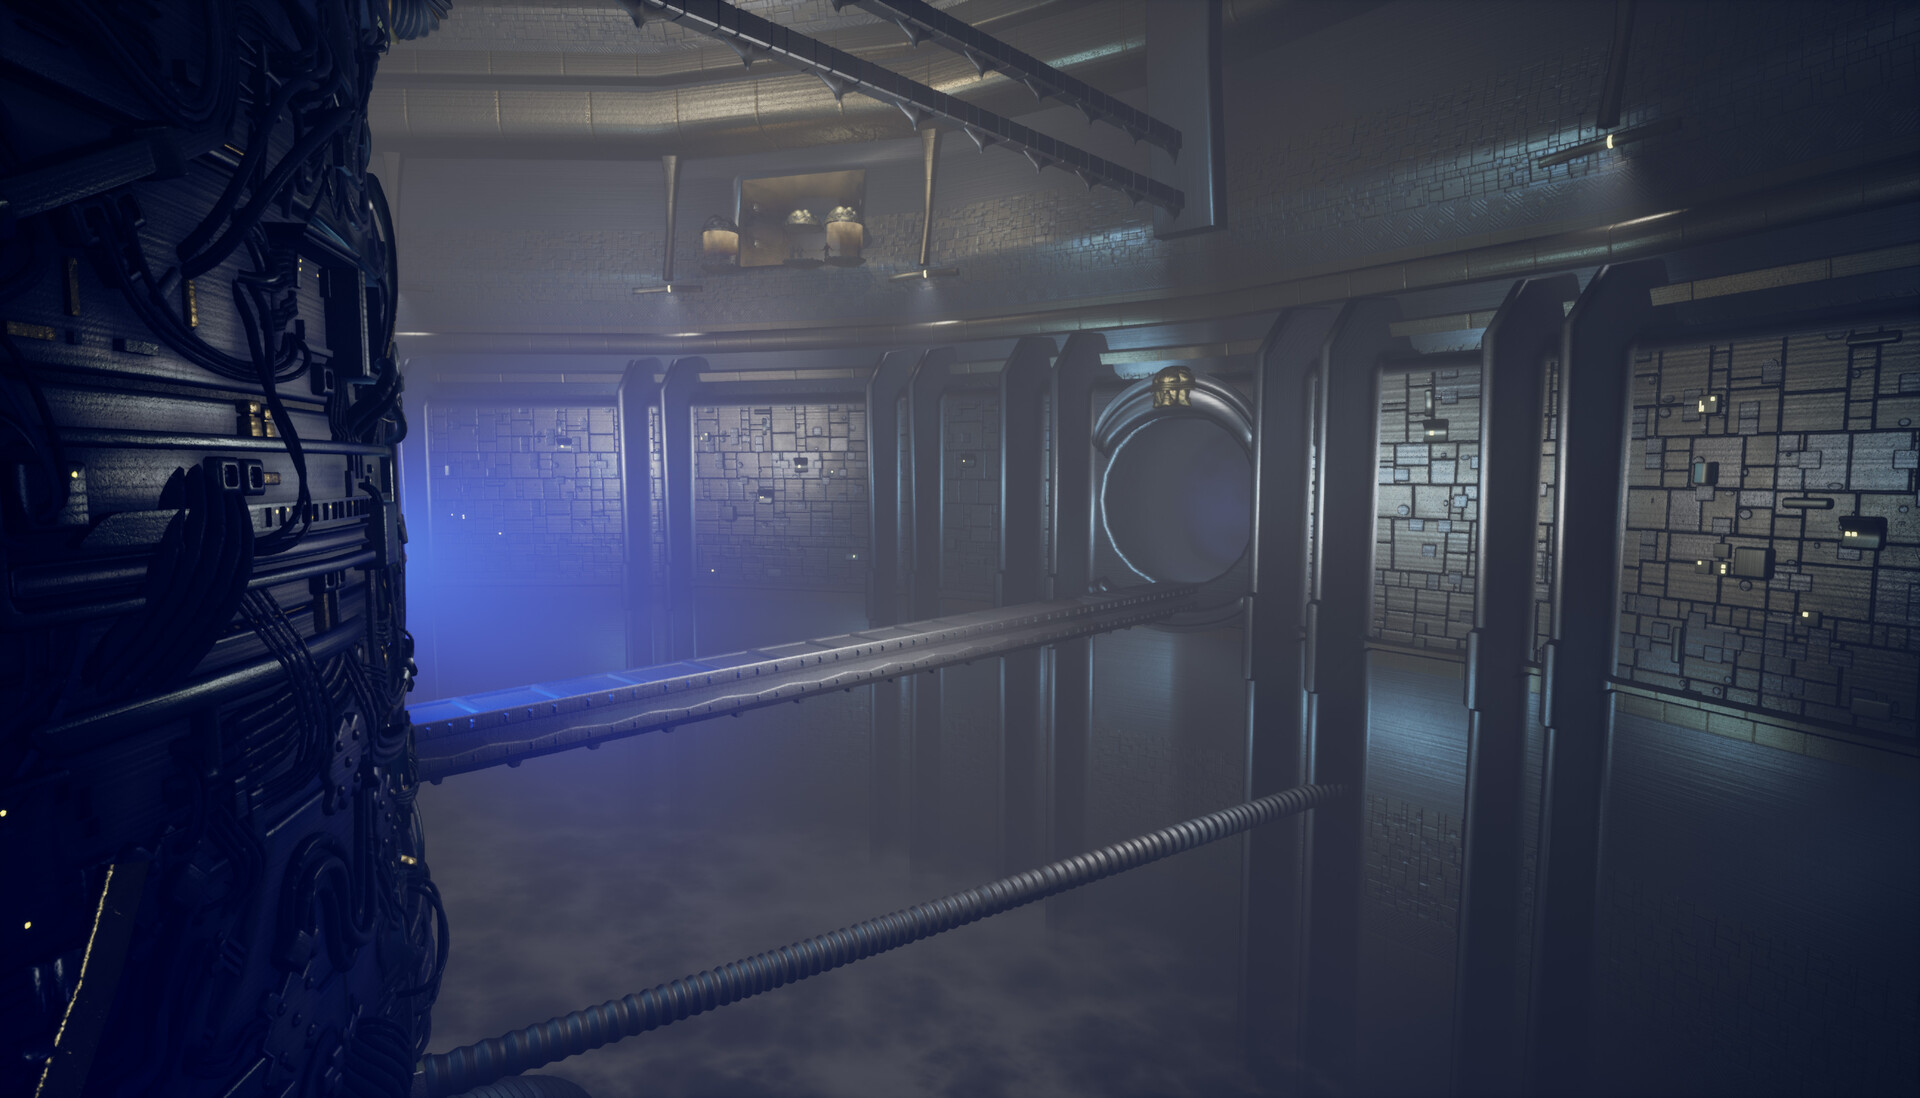
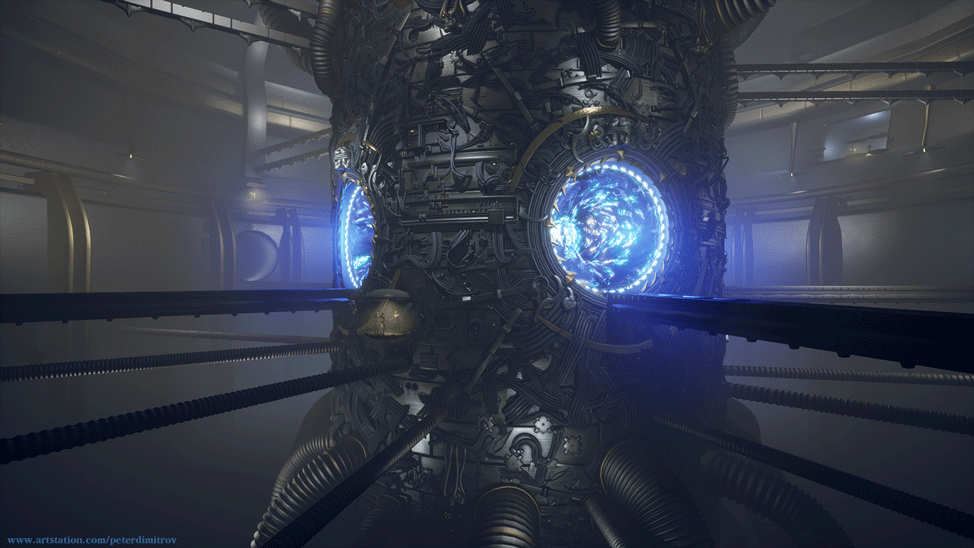
I also worked more on my trimsheet that I deploy in the background. I added a part to it that has panel-like details and greeble like features. You can see that above.
Optimization
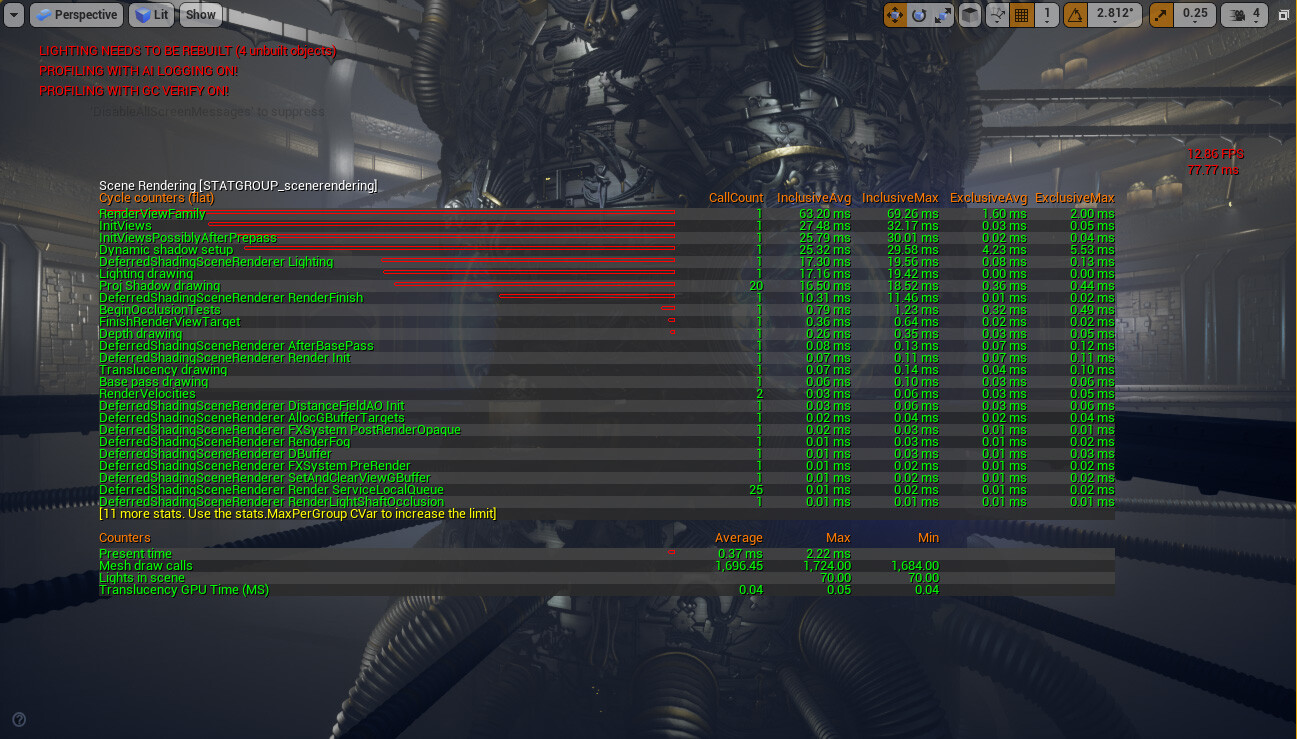
And all of this takes us to today. Tonight I decided to try optimizing the scene a bit. I had spline meshes, non-static parts and materials in the scene that I wanted to improve tech wise. It would not be a successful video at the end, if I were to leave the performance as it were and recorded at 15 FPS. : )
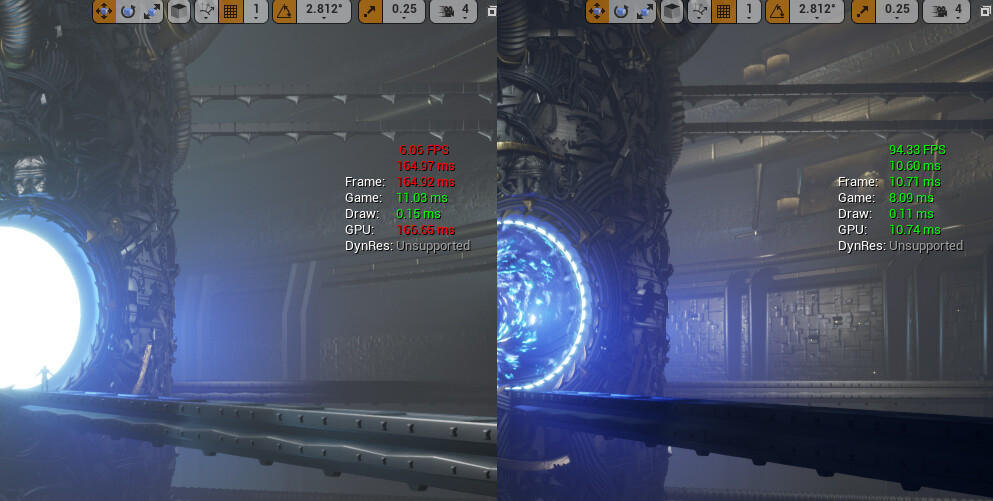
Before. Constant at 75-80 ms:
After. Stable at around 18 ms.
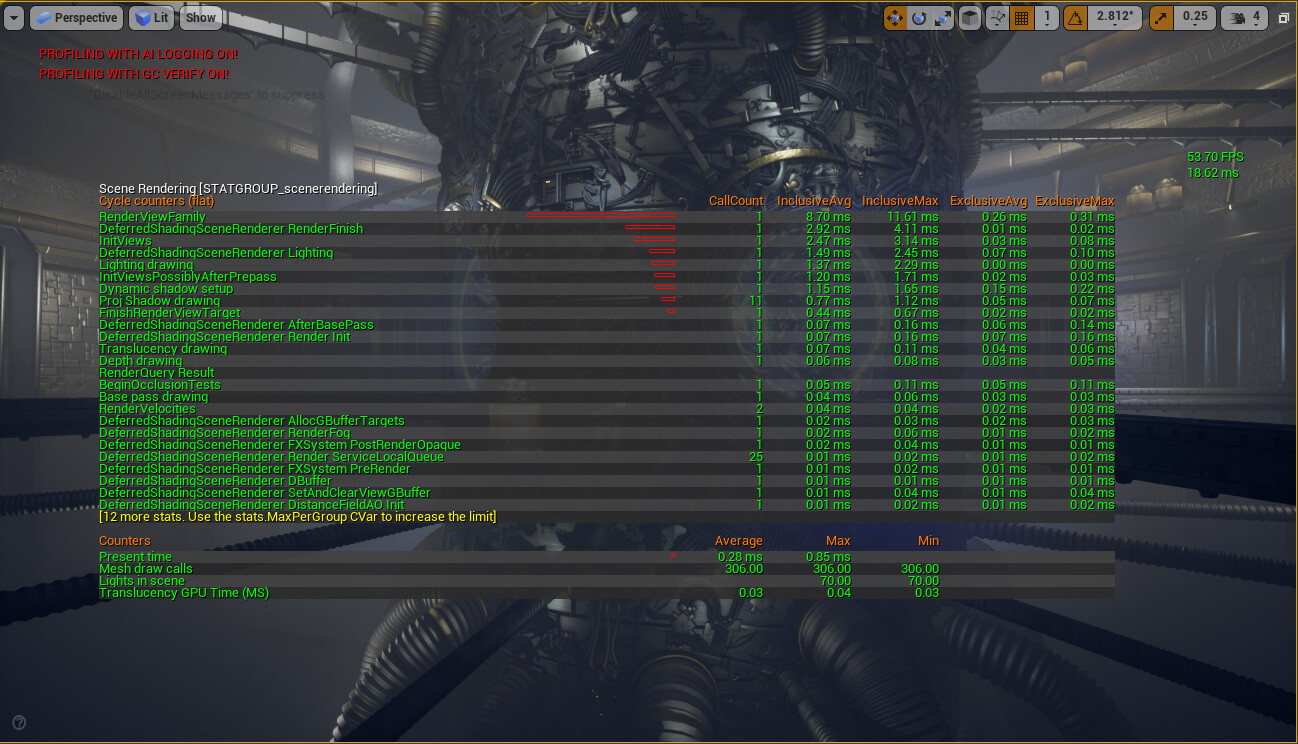
With some more clean-up and with no stat scenerendering on, I’m sitting at a stable 10 ms. Quite better even than the previously mentioned 18 ms. This is not in standalone form so one could argue it might be even better there. I think for recording the video I’ll play a timeline through a cooked standalone project and maybe get a bit of a boost in ms from that too.
MS Comparison
All in all I think it will do for now. Here is one final comparison to an ms observation from a week ago to show you how slow it was, lol.
Gif Progress
But away from this, and back to visuals. Here is a GIF:
Hope you are doing well.
Thanks for reading,
Pete.
Commentary from 2023
I wanted to quickly mention how exactly I accomplished the big win in performance above. I think anyone with experience can derive and make an educated guess, just by looking at my stat scenerendering profiling pictures above. Yet I write and share these posts with a lot of students too and I wanted to explain it a bit better for them.
In the making of this project, I heavily relied on spline blueprints.
When there is a long platform, be it straight geometry or cylindrical motives, instead of placing by hand a repetitive, modular piece, I would feed that piece into a spline blueprint system of my own.
It made the art creation process much more quick and powerful.
There is one caveat though. When you work with spline blueprints like that you end up leaving all parts as “Movable” instead of “Static”.
To be able to edit a spline curve on the go too, the nodes derive tangent points.
All of those pieces stack up in draw calls. When you place one long platform that is a spline blueprint, instead of having say 1 to 5 draw calls you end up with 150-200, because of all of the spline components.
When you put an identical platform spline blueprint copy next to it, that gets its own 150-200 draw calls too. They don’t get bundle together with the first one.
I knew this from the very get go, when I started adding splines. I knew I will need to go back and clean up and “bake” my geometry into truly static geometry.
The “Before” and “After” screenshots above, you see me doing exactly that. I select my spline blueprints and I use the Unreal 4 Editor integrated“Merge Actors” function.
That turns my one, super long platform (for example) that has 150 draw calls into one piece of geometry, that is say mid-poly, but is 1 draw call.
I then reuse that super long platform, to the sides, by replacing the rest of the similar blueprints.
I make sure I don’t change the x y z scale of those copied platforms (otherwise the draw calls get separated again, even if not as bad as before).
Doing even more actions, similar to the above description, I optimized the draw calls in my scene from 1,696.45 to 306.00.
That on its own got me from 77 ms (12 fps) to a 10 ms (94 fps).
Unrelated to the Blueprints or Splines above, but if you are using the Unreal Geometry Brushes to block out spaces, bear in mind they have similar caveat of draw calls.
Each of those brushes, in its nature to be editable on the go, comes with dozens of draw calls instead of optimized just a few calls.
I often come across student’s block out projects that run at bare minimum FPS. They often ask and wonder why that happens and most often my advise is either to bake down all of their Geometry Brushes to truly static, non editable geometry, or to start blocking out using primitive Static Meshes.
Have fun in Unreal!
Pete.