
After finishing the casket prop, I’ve had time to go back to the overall scene and continue working on missing props and details for the landscape. The other thing is refining textures and figuring out how exactly I’m going to tackle making the neon signs. Previously, my neons were just simple alpha cards with an emissive text. Although in its core that’s what neon signs look like anyway, I wanted to put more attention and detail into them than just that. Possibly build a more complex material shader.
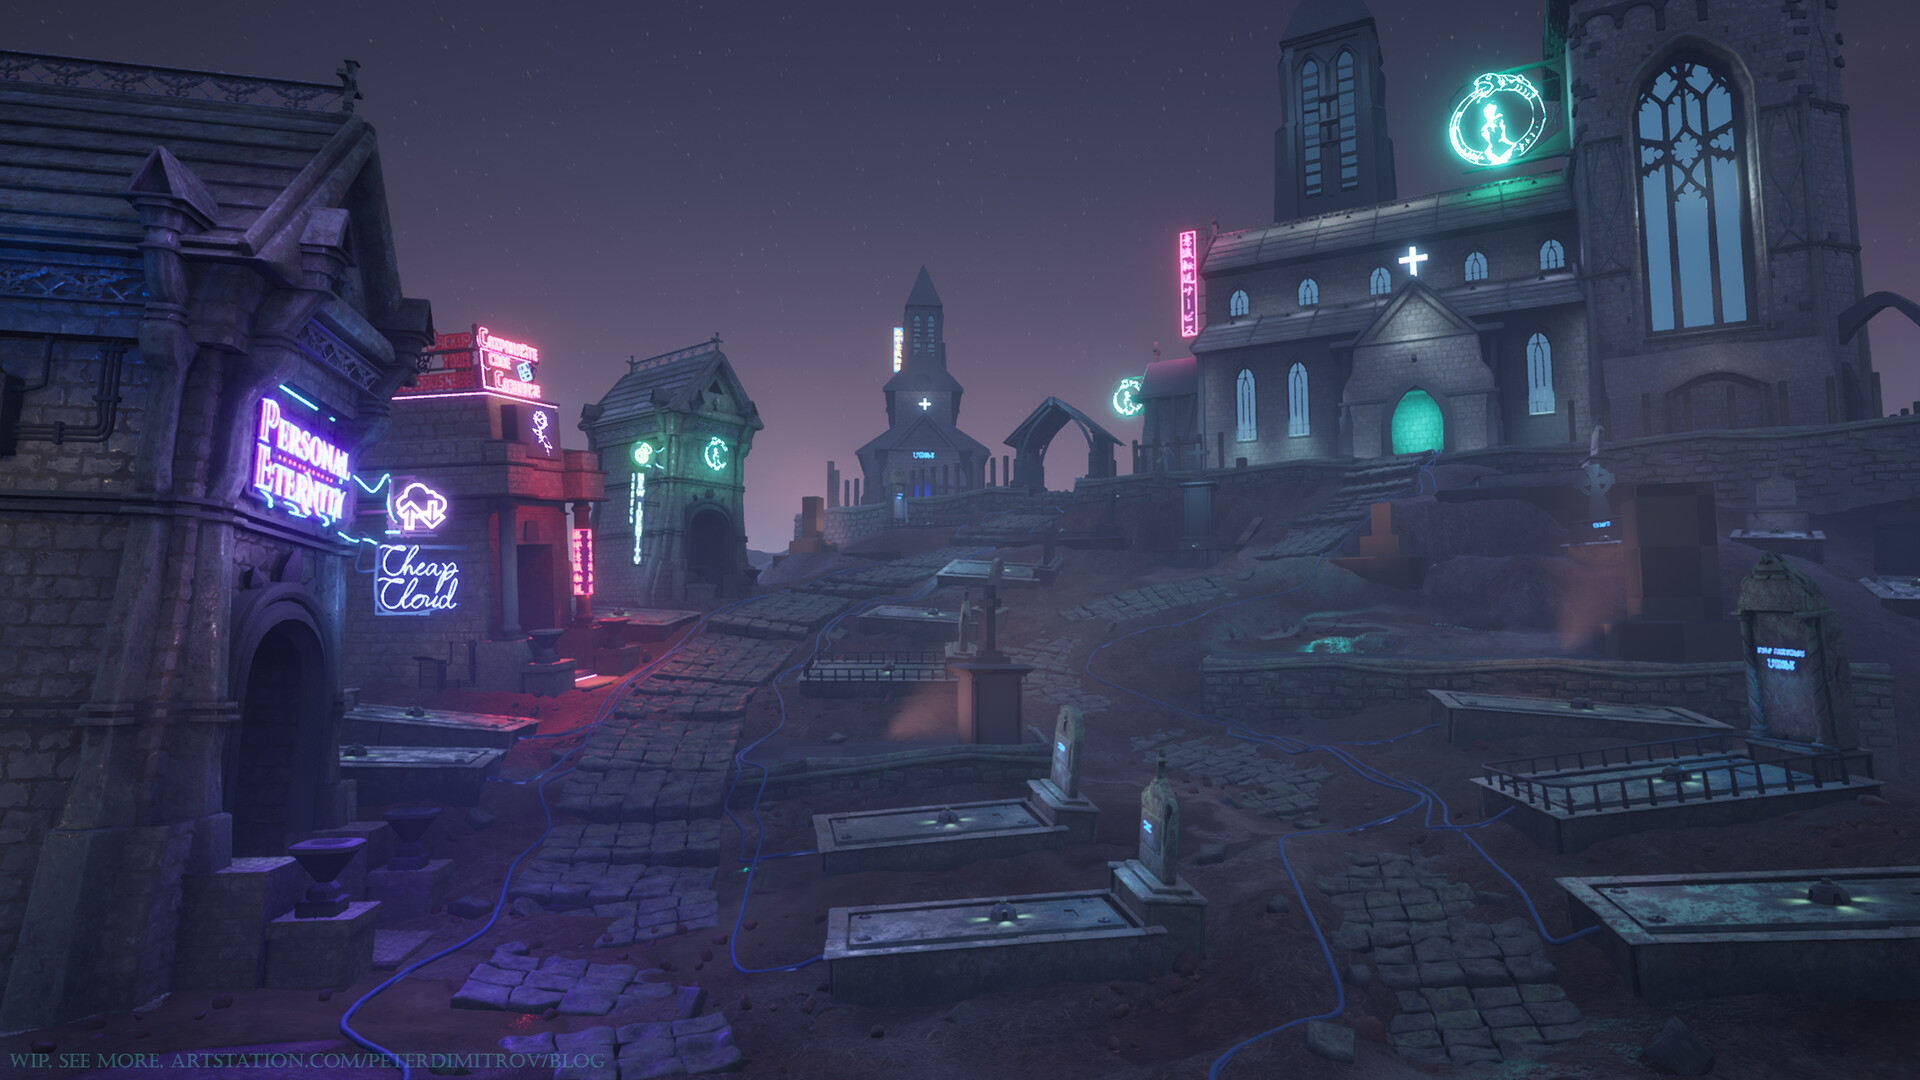
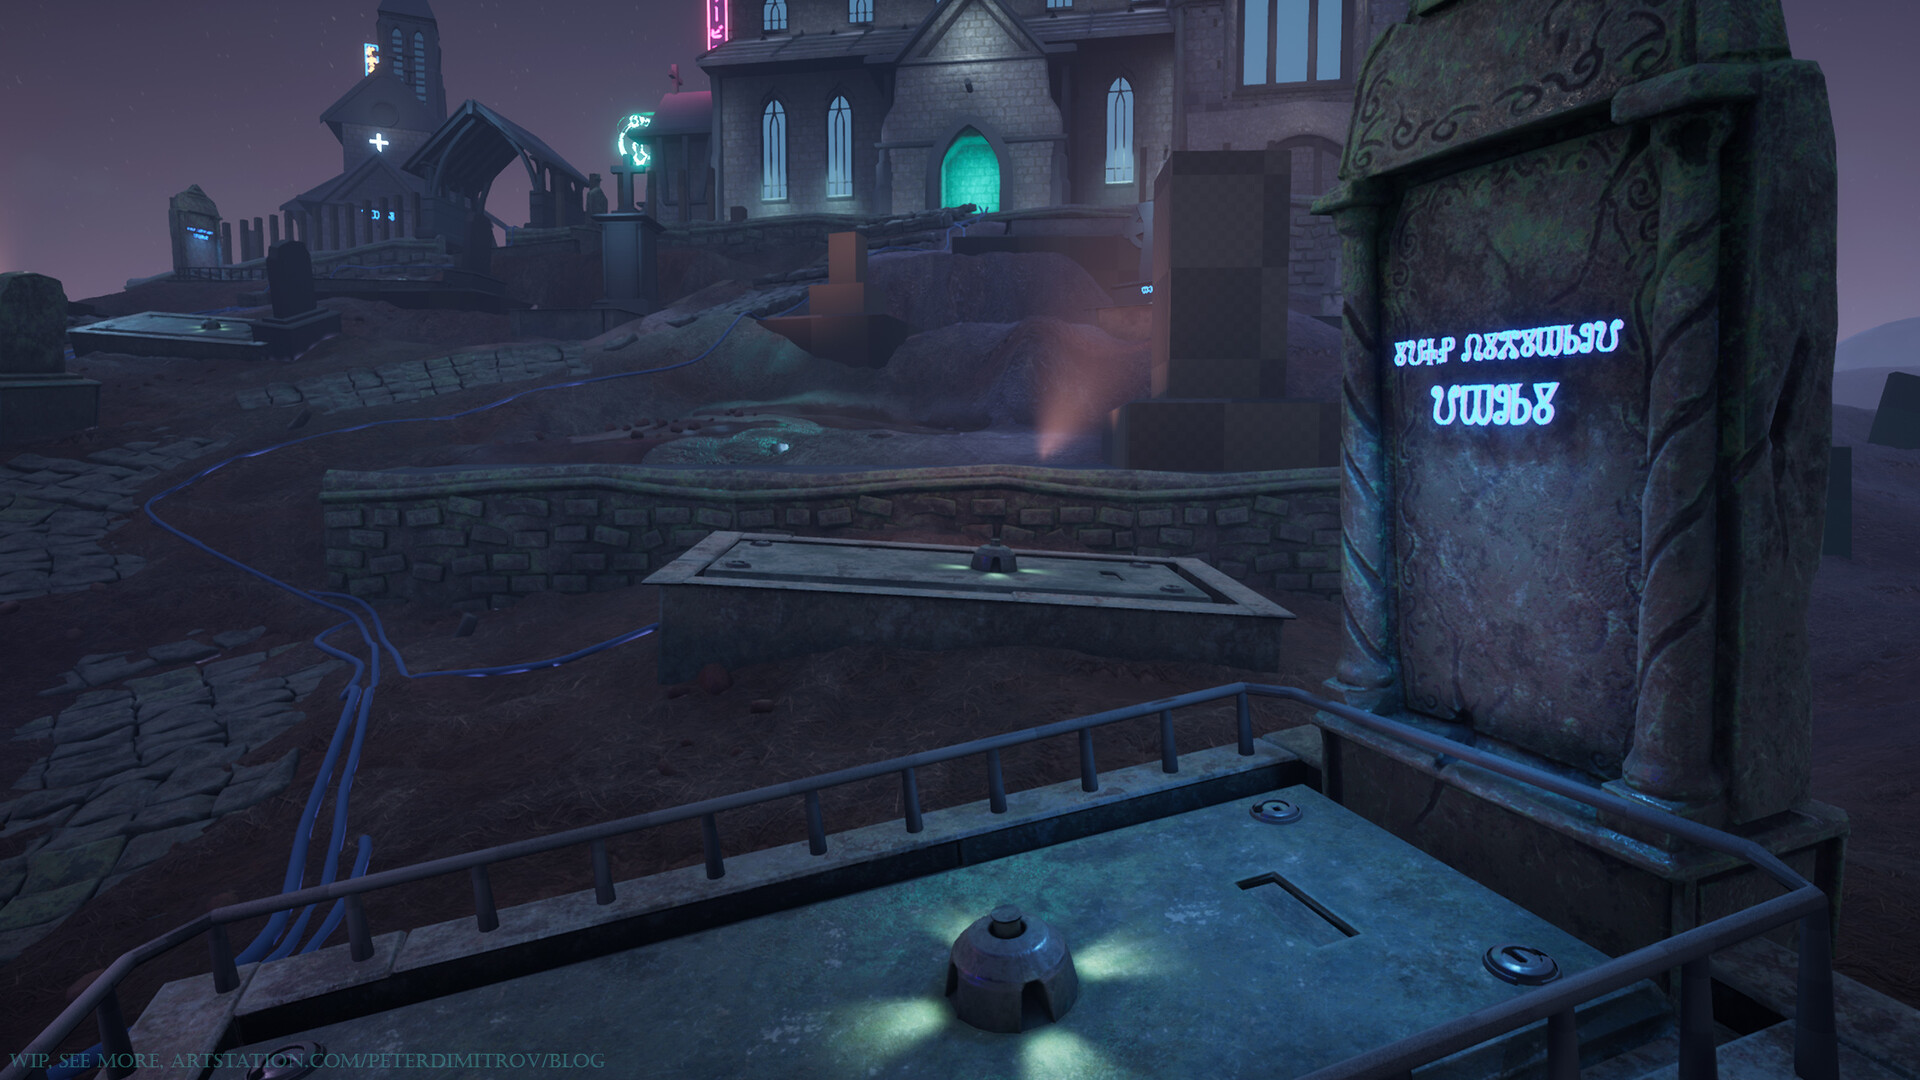
As the last two posts were about the casket, it’s been a very long while since we’ve last seen the scene as a whole. As such I am just going to show you at what stage I am right now, and then we can talk about how I created the different bits.
The Scene
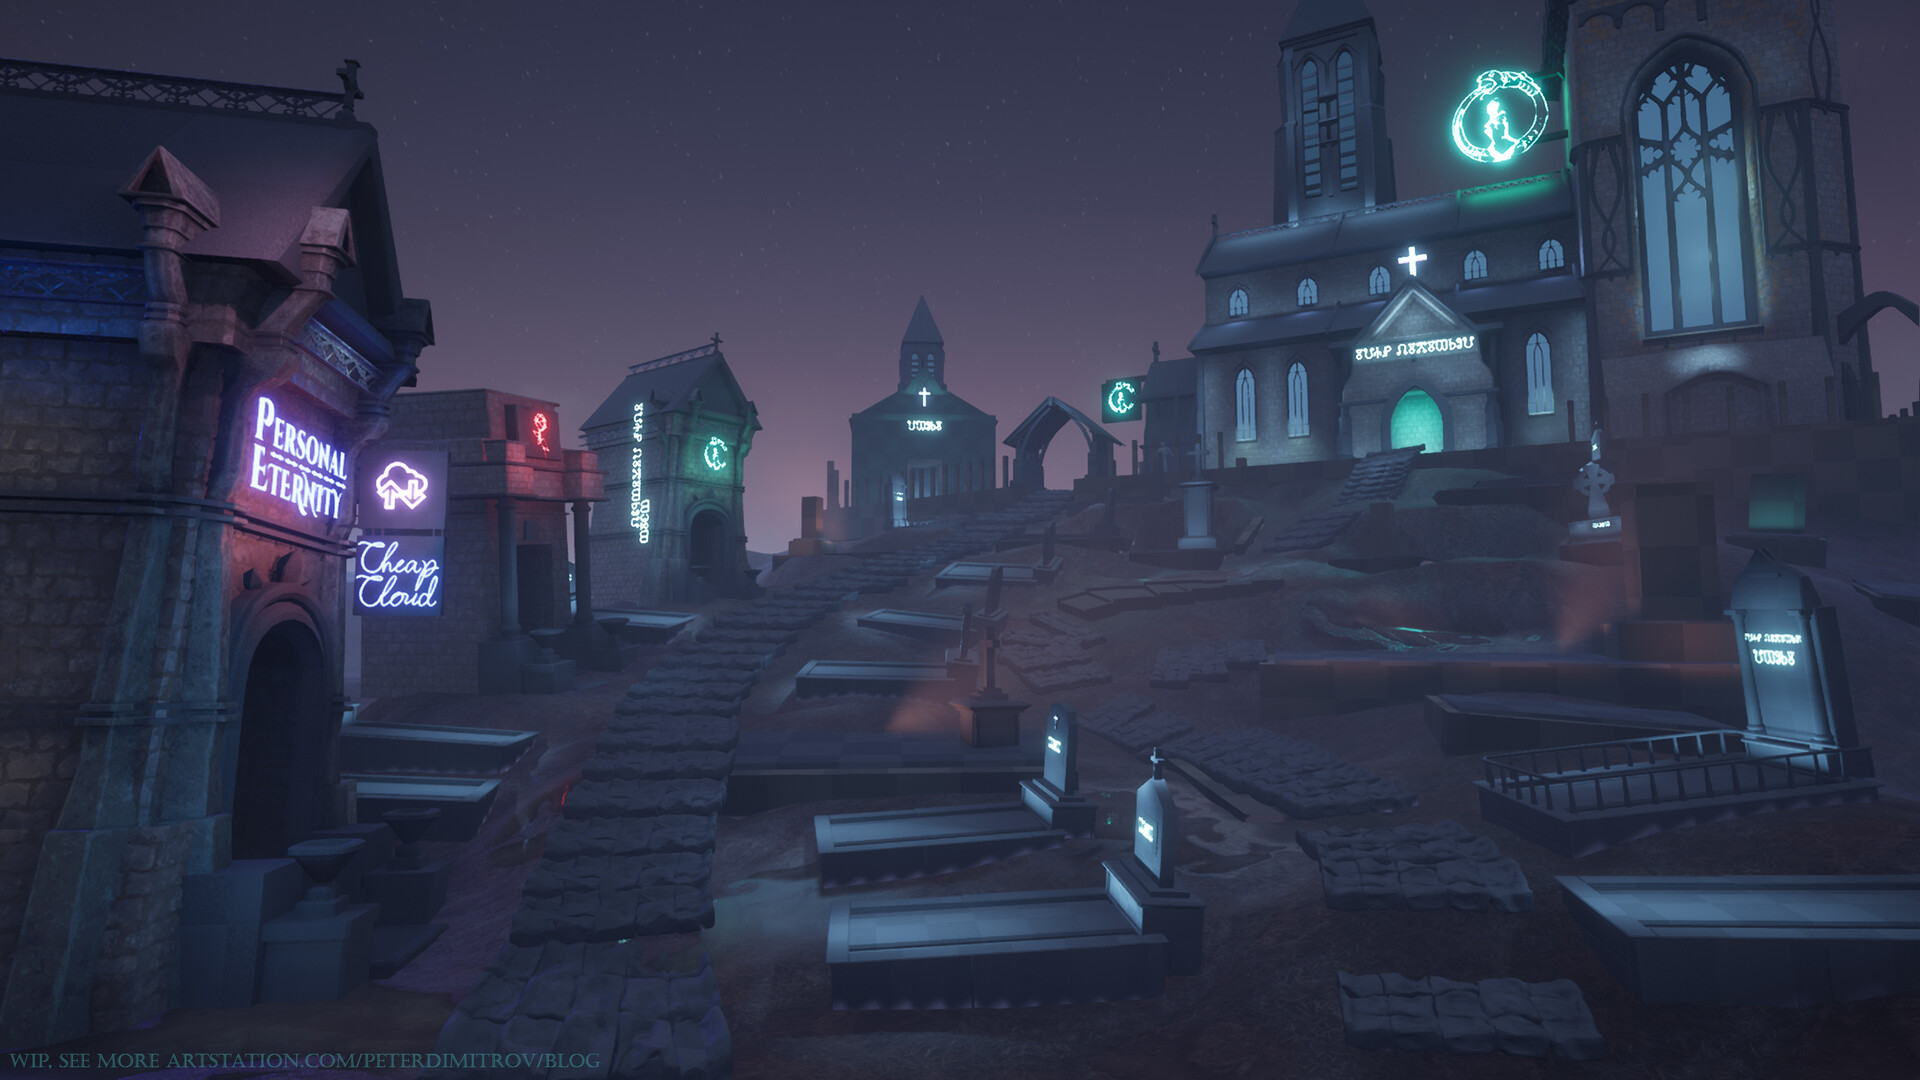
And just as a reminder - this was we had before (three weeks ago or so):
Neon Signs
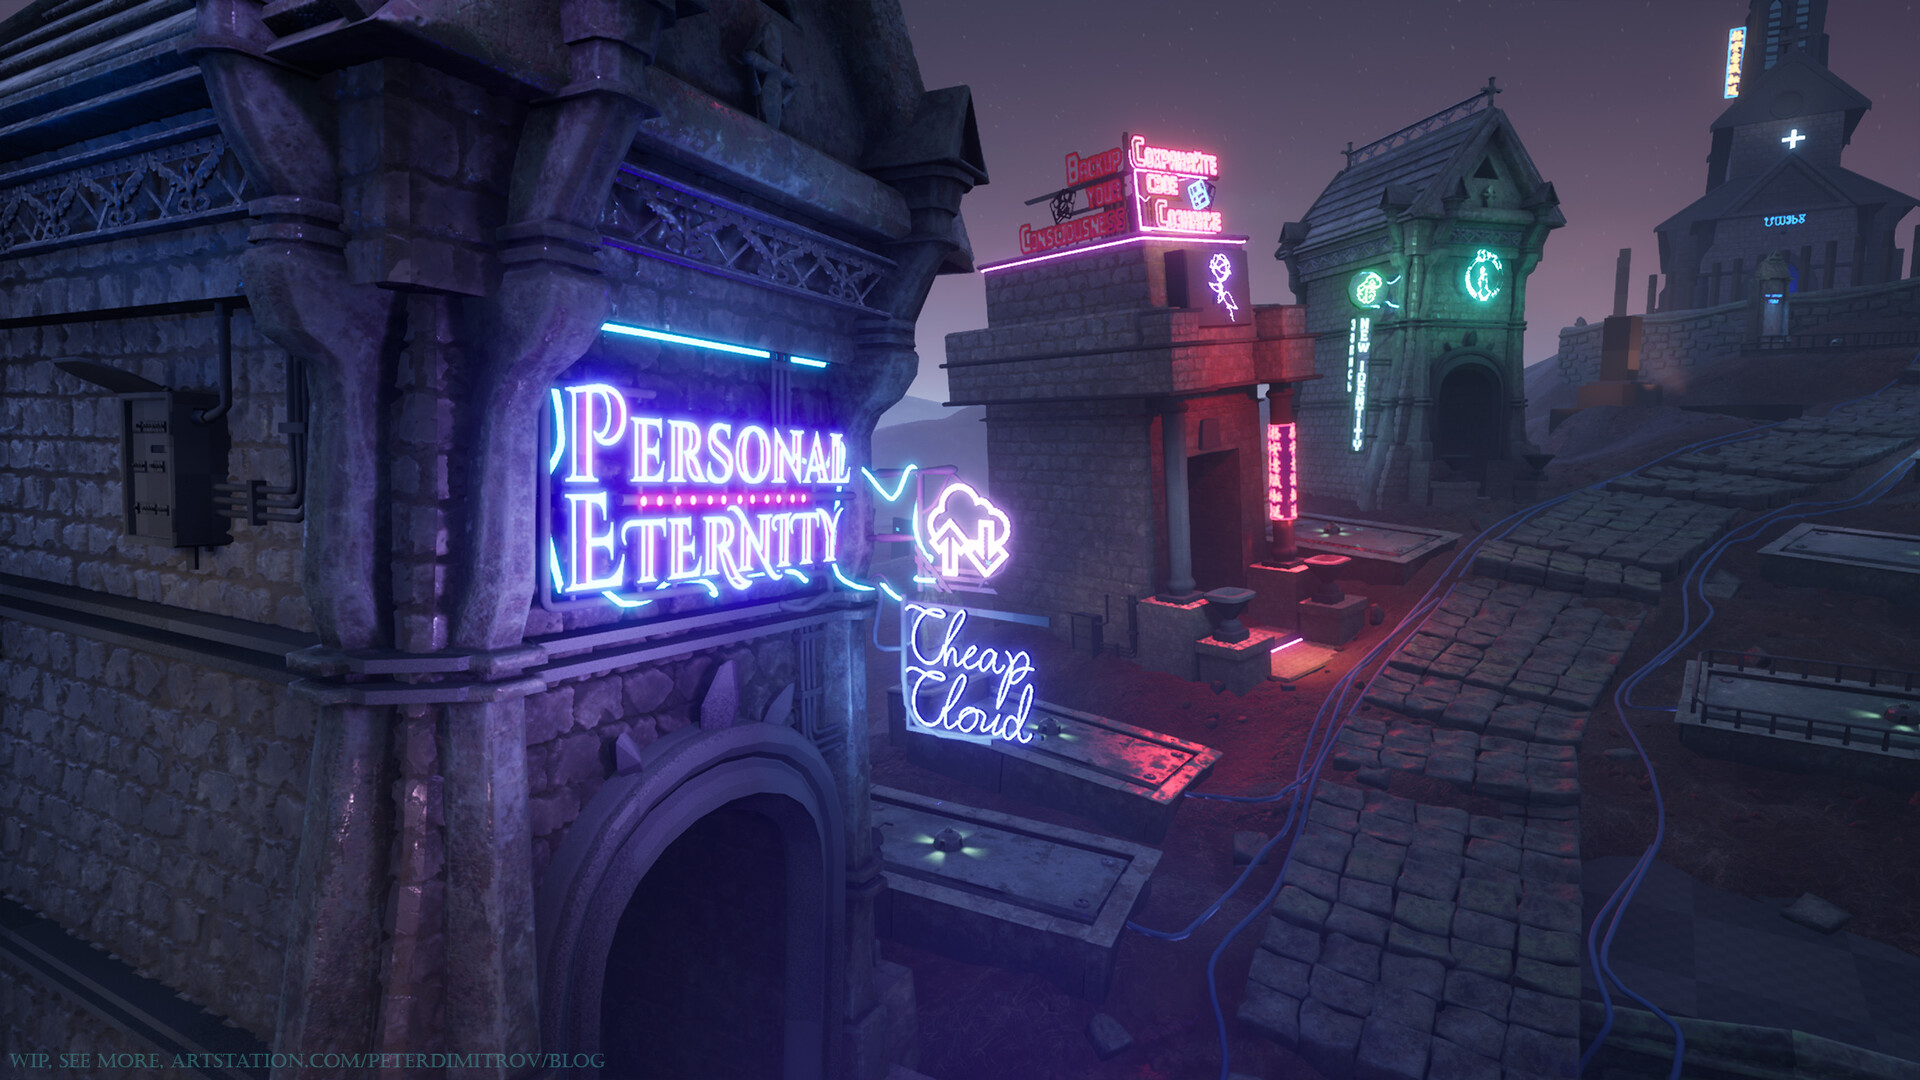
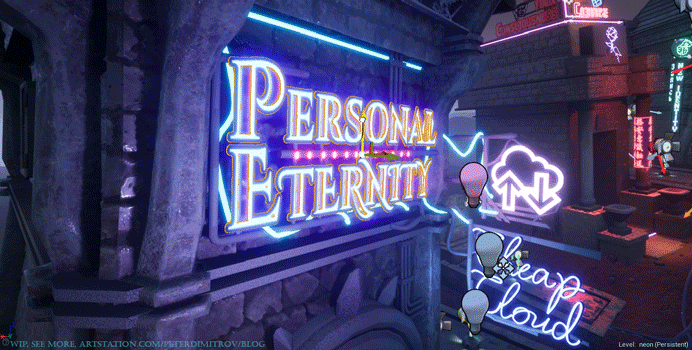
From close up, this is how the “Personal Eternity” sign looks like:
And a few GIFs to show the animations I’ve put in the signs. (gifs are heavily compressed as Artstation caps the file size at a very low amount).

I intend to make some even more dynamic, by having letters flick. The metal mounts of each sign still lack textures, but that will be for later.
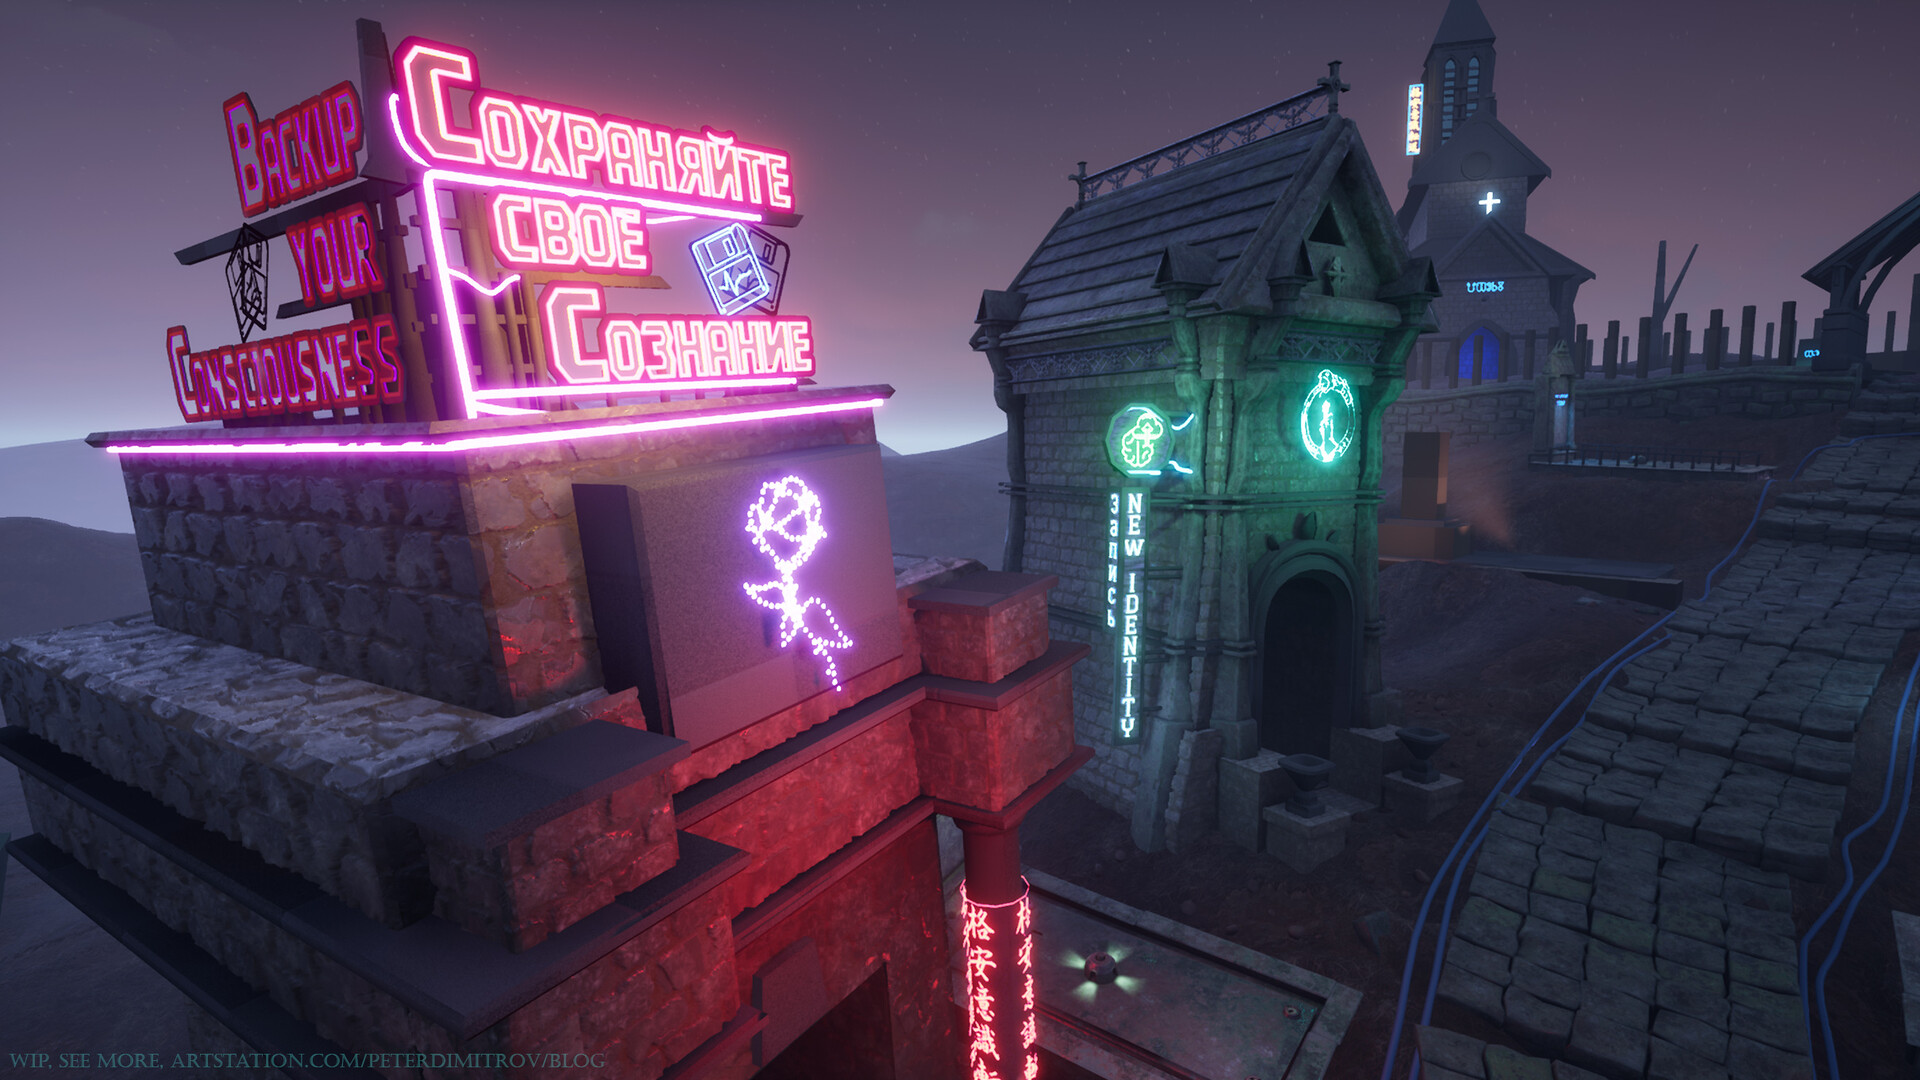
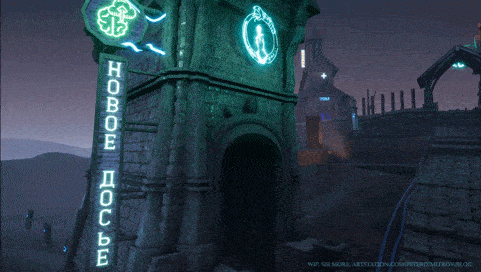
The text that’s lit up is in Russian and reads the same way as the English one next to it “Backup your Consciousness”. It’s going to be a play on words as well, which I will animate for the final video. The idea I have in mind with that is about the text in Russian, appearing lit up fully at first - “Сохраняйте свое сознание”. The whole sign then flicks on and off a few times, as if short on electricity. When it powers up again, its left with just “охраняй сознание”. First and last two letters from the first word are off, second word is entirely off. And what we are left with reads from “Backup your…” to “Guard your Consciousness”.
Making the Signs
At some point, I made the alpha cards of the neons into 3D objects. I made a few of the texts into actual geometry, but then when I inserted them in, you couldn’t really tell from afar that they are dimensional and 3D. Going up close to them, most still looked relatively the same - flat. That’s why I decided that there is no really point into turning them into expensive on memory 3D.
Plain text with an emissive material was flat as well, and as such I went into trying to figure out another way to make them look better, more dimensional, and more neon-ish. That’s when I though of trying a transparent text with a border. I then put a second border to that said border. The inner border, I assigned bright color together with emission. The outer border, I left dark. The fact that they are transparent from the inside, boosted the illusion of “neon”. What I discovered then, is a trick I made up which turned them actually dimensional (sadly probably not very well seen in the GIFs due the small image size). I duplicated the text as it is in the world in the engine. I then offset its position by a few pixels backwards from the original position. To that second copy, I then applied an instance of the original material. In that instance, I can change the previously exposed parameters such as the colors of the inner and outer borders, as well as emission level of the glow. Then, by changing those colors, to ones completely different from the original, I managed to create an illusion of depth. The result is best seen when you move the camera while looking at the signs from a side. The secondary colors, from the text copy that is behind, leak and bloom softly. They contrast so well with the front text, that whilst you move, they make the whole text appear as if an actual neon, with dimension and shifts in the value and hue of its color. That effect is apparent even from the static shot seen above, that showcases the “Personal Eternity” neon.
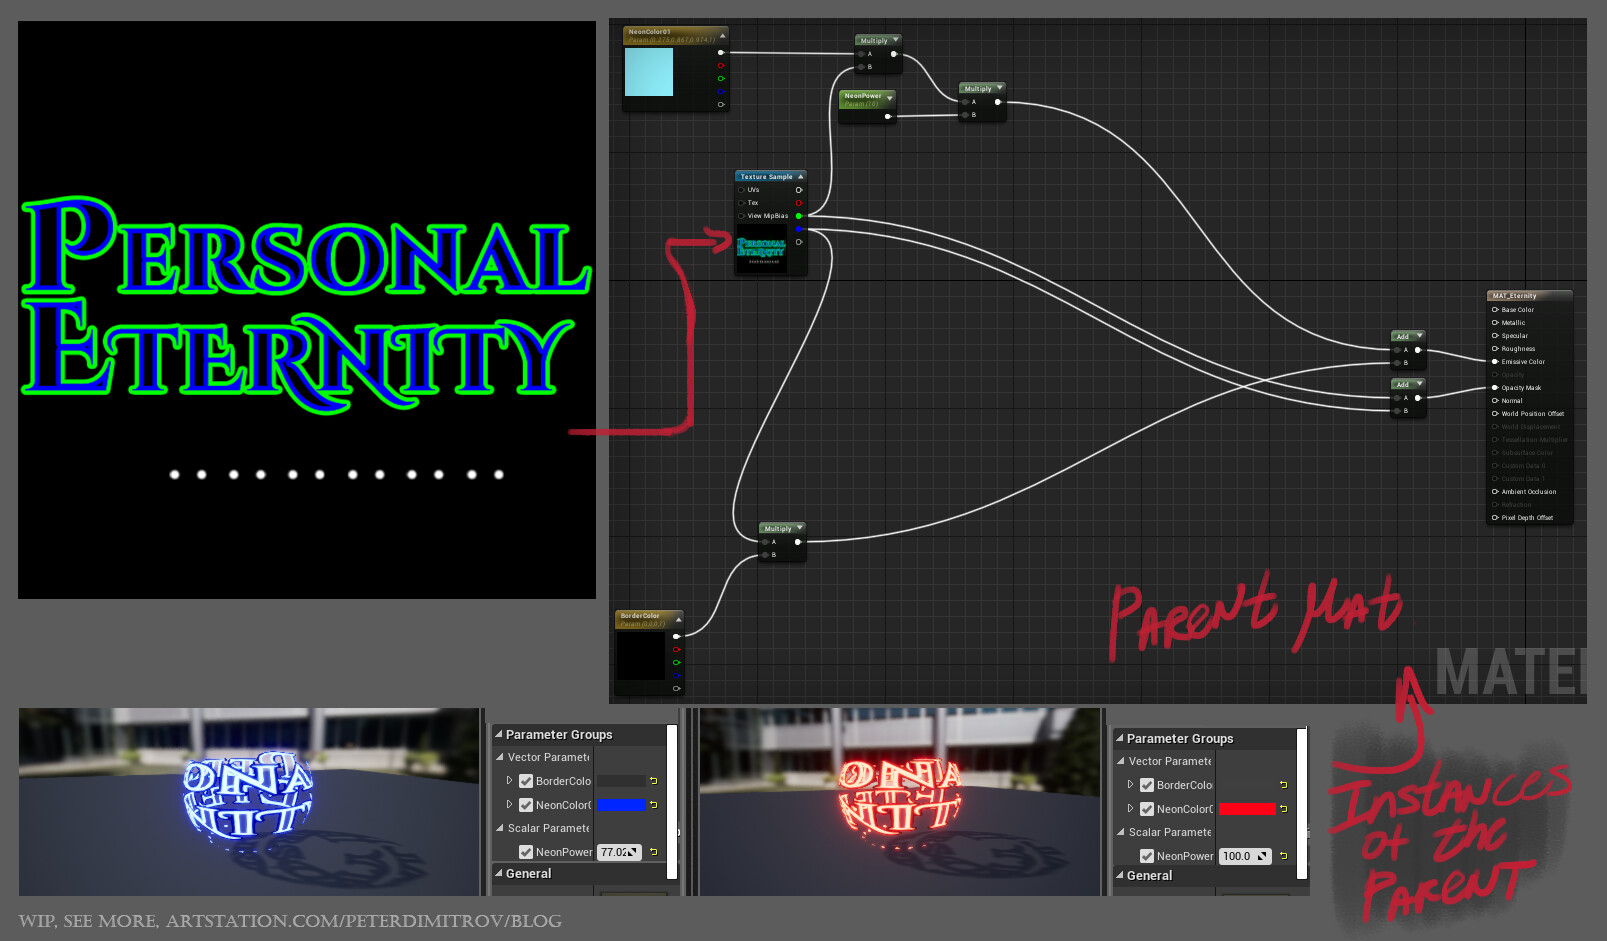
The borders, I created in Photoshop using Blending Options - Stroke. To keep everything optimised, I suggest making those masks into a single image. In the image above, I’ve put the two different borders, onto two channels - one on Green, the other on Blue. In the material shader, I simply take those channels and assign them color and emission value.
I’ve showed you how I do this with a single text - “Personal Eternity” taking a whole bitmap of 512x512, but for this project, I actually keep every text and neon design, into one single image. In a 2k texture, you can fit much more than you would think, and using every channel - R, G and B - allows for even more effects and optimisation.
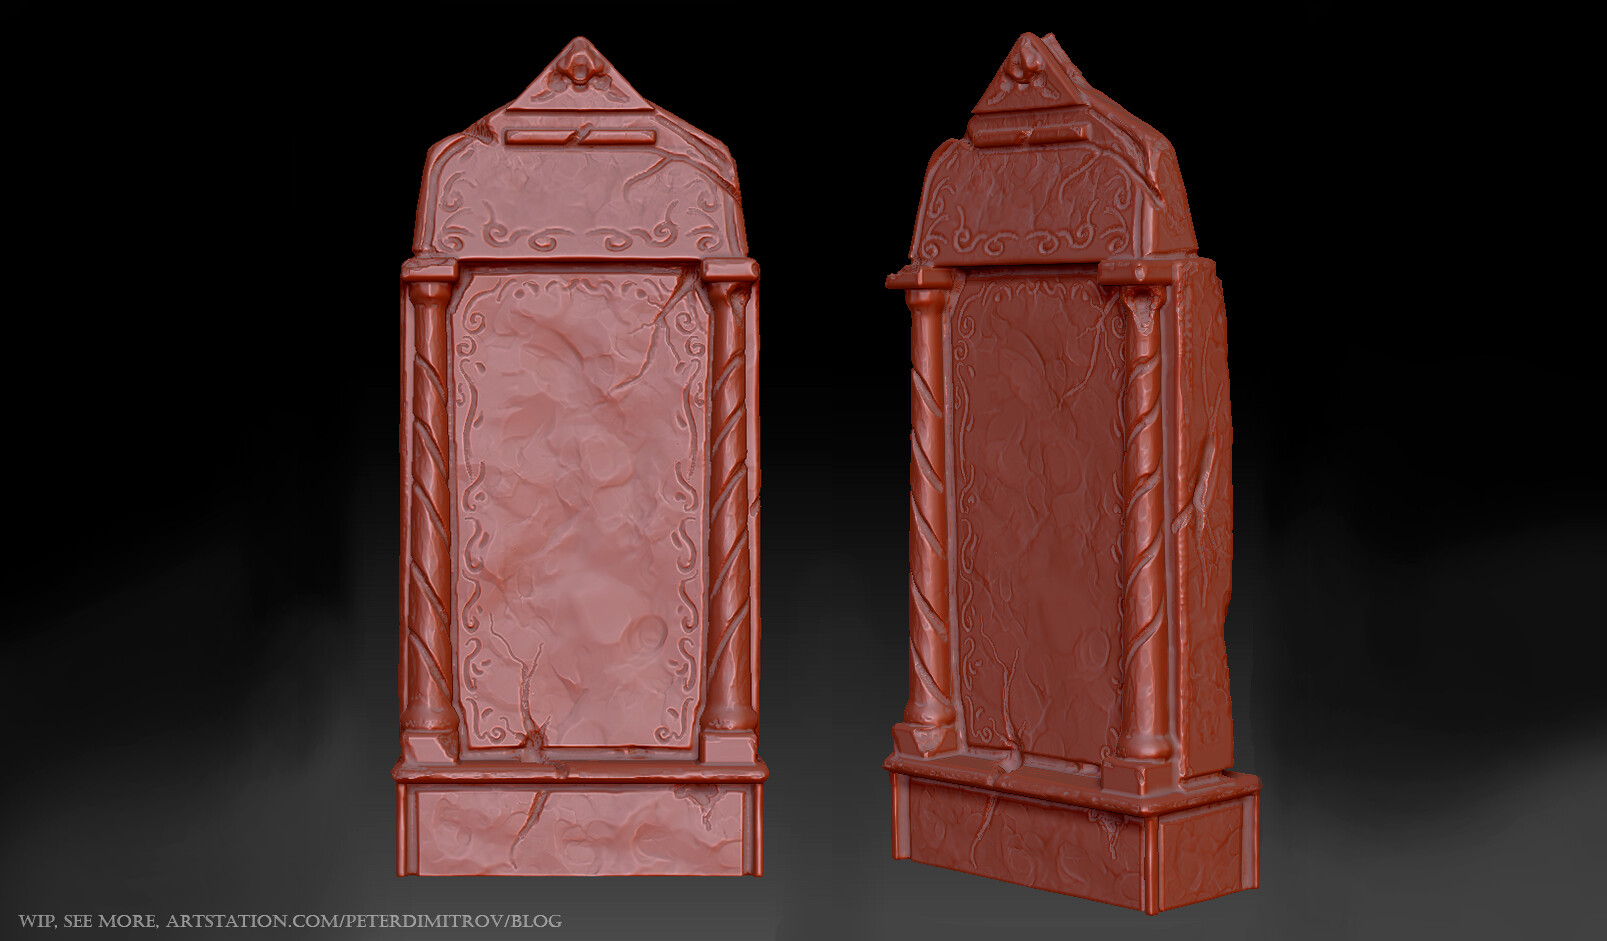
Headstones and Other Props
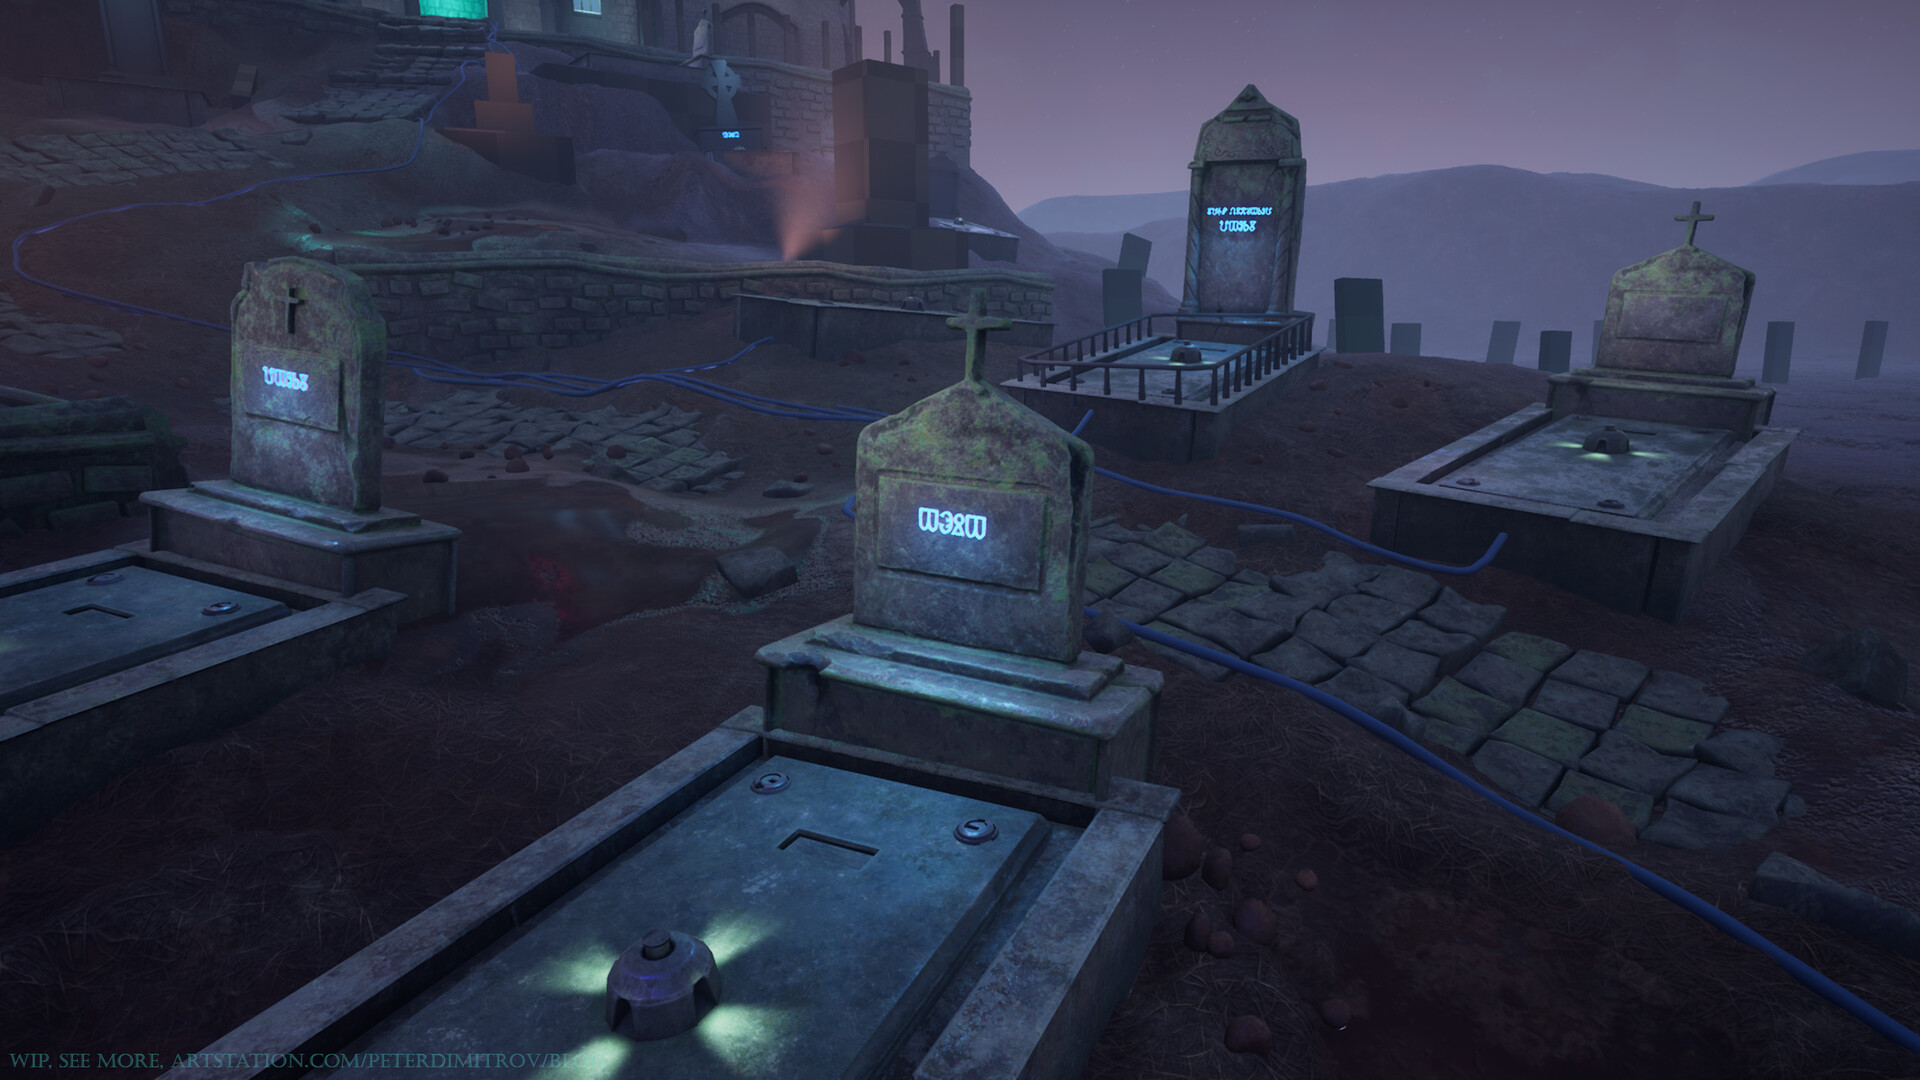
In Zbrush, I imported low-poly models of headstones that I created in Maya. I turn them high-poly by dividing the geometry with smooth off. I then sculpt detail on that and when I am happy with the result, I create a new, low-poly version, by decimating the topology. For that, I use Decimation Master, that can be found in Zbrush.
The headstone seen below, I decimated from 2.3m tris to 2k using Decimation Master. When you go to poly that low, you can freely take the model in Maya, and UV map it by hand. 2k tris is not too much, and as such the automatic mapping in the newer versions of Maya does quite a good job. It takes most of the flat surfaces and gives you whole UV islands, and it leaves just a few weird triangles here and there, that you can quickly sew back in place. Small edges with lots of damage on them, usually get mapped weirdly too, but you can go over those and fix them with relative ease.
Later on, I’m thinking of giving the weird letters on the headstones, actual metal mounts and have some cables run towards them from the ground. Right now they sort of give the vibe of magical runes.
Other Things
For the landscape I’ve scattered some detail using small rocks, broken pavement as well as some cables. I’ve created the cables as a spline system, and although it took a bit of time to place as many copies as I’ve done, it was very fun to do. Obviously, I tried having them glowing at first, but decided against it as it was getting a bit too much in the way. Their texture might still need some more work though.
The cathedral in the distance will still need some more attention. I’m thinking of some decals and props to scatter and give variety and detail both to the roof and to the walls. The windows will have stained glass material to them, with an emissive mask. I’m hoping to achieve some electrical whimsical colors, to fit the Cyberpunk vibe. I’ve left them for this late on, as I already have plans on how to create them in Substance Designer. Working on materials like that is probably one of the things I enjoy most in 3D, and frankly said, that’s why I am keeping them as a treat to myself after I get the rest of the important things done.
Hope you found this post insightful and interesting. Until next time,
Pete.
P.S. My abilities in the Russian language, are limited to the few lessons I’ve had years ago, back at home in Bulgaria. As such I want to thank Alexey Shiyan for double checking my signs, and assuring me, that my whole idea behind the play on words, actually works. : )